

How to draw a simple and easy snowflake for kids. This step-by-step snowflake drawing tutorial will help your students create their own beautiful winter snowflake in 6 easy steps! Featuring simple black outline drawings and illustrations, our snowflake drawing guide is quick and easy for beginners. Download our printable snowflake directed drawing worksheet or follow the full drawing tutorial below.
Snowflake Step-by-Step Directed Drawing
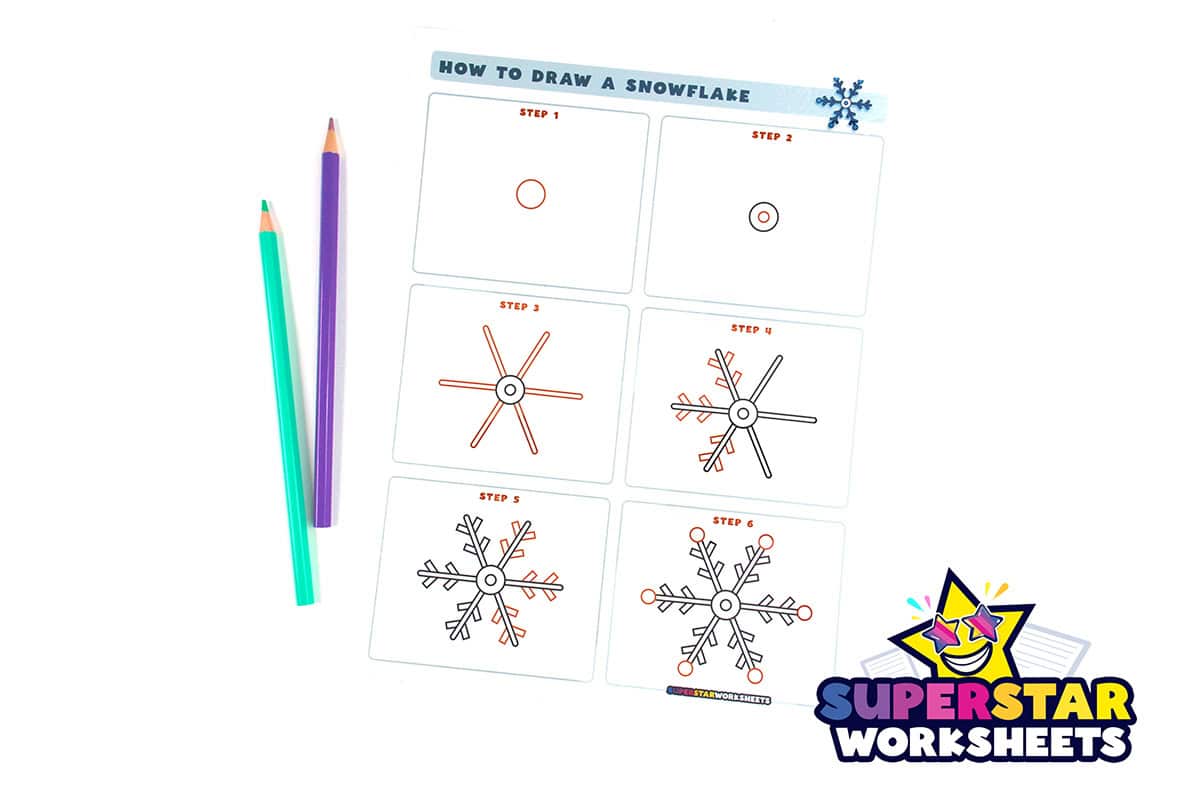
How to Draw a Snowflake
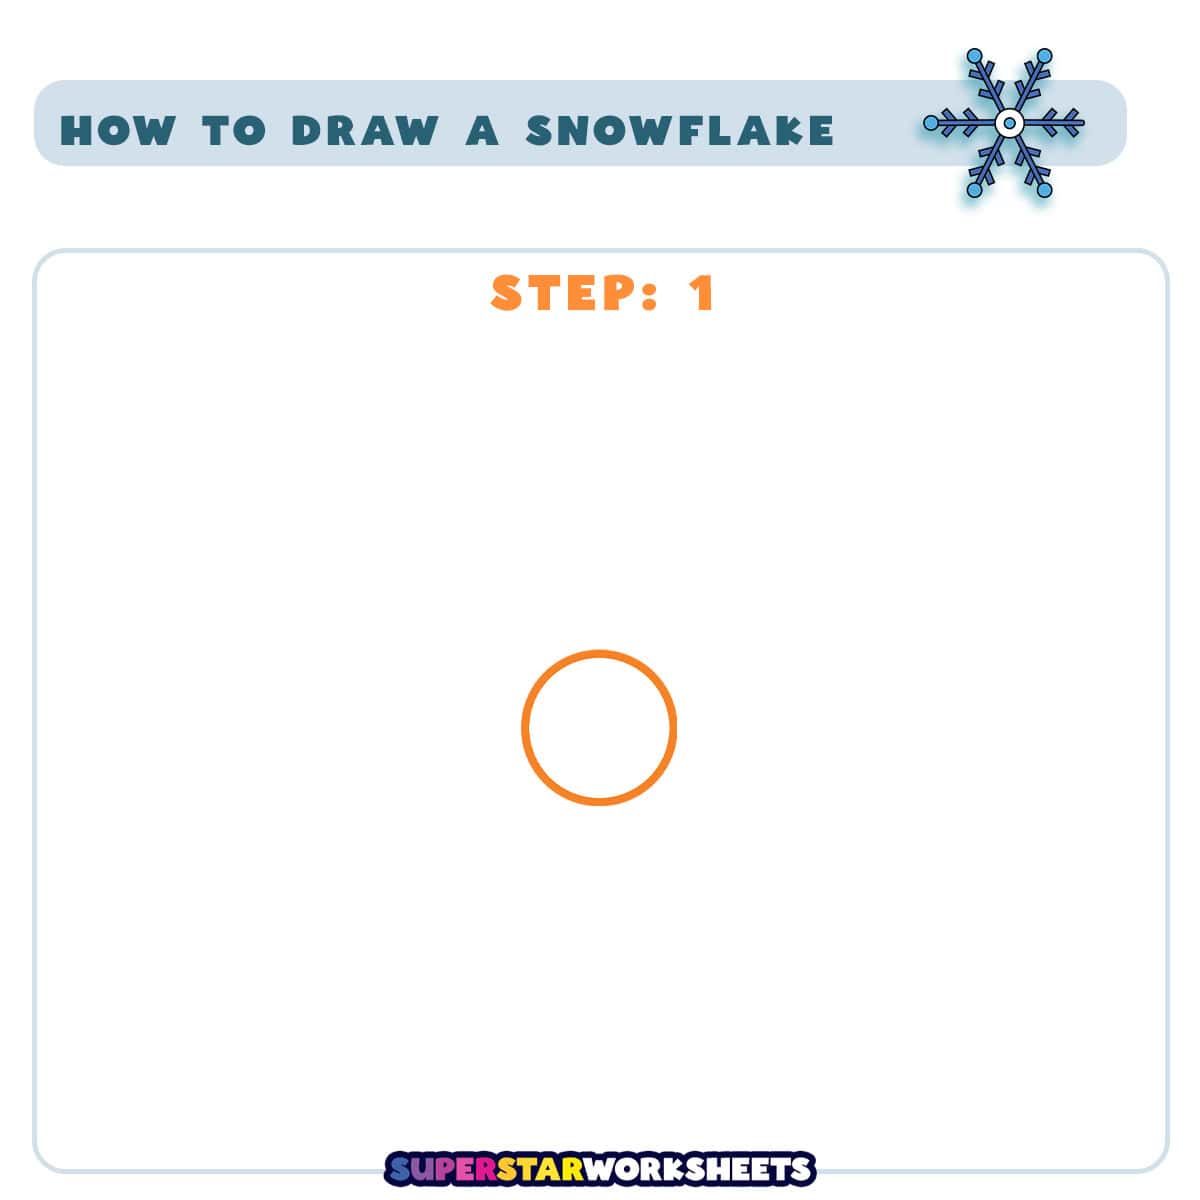
Step 1
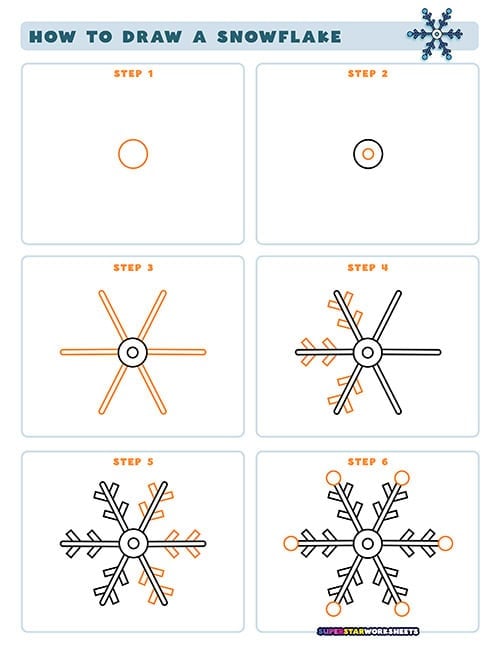
Using a pencil (so you can erase), let’s start our snowflake with a simple circle! Draw a small circle in the center of your paper – this will be the middle part of your snowflake. Make sure your circle isn’t too small or too big, as we’ll be adding lines radiating out from it in the next steps.
How to Draw a Snowflake
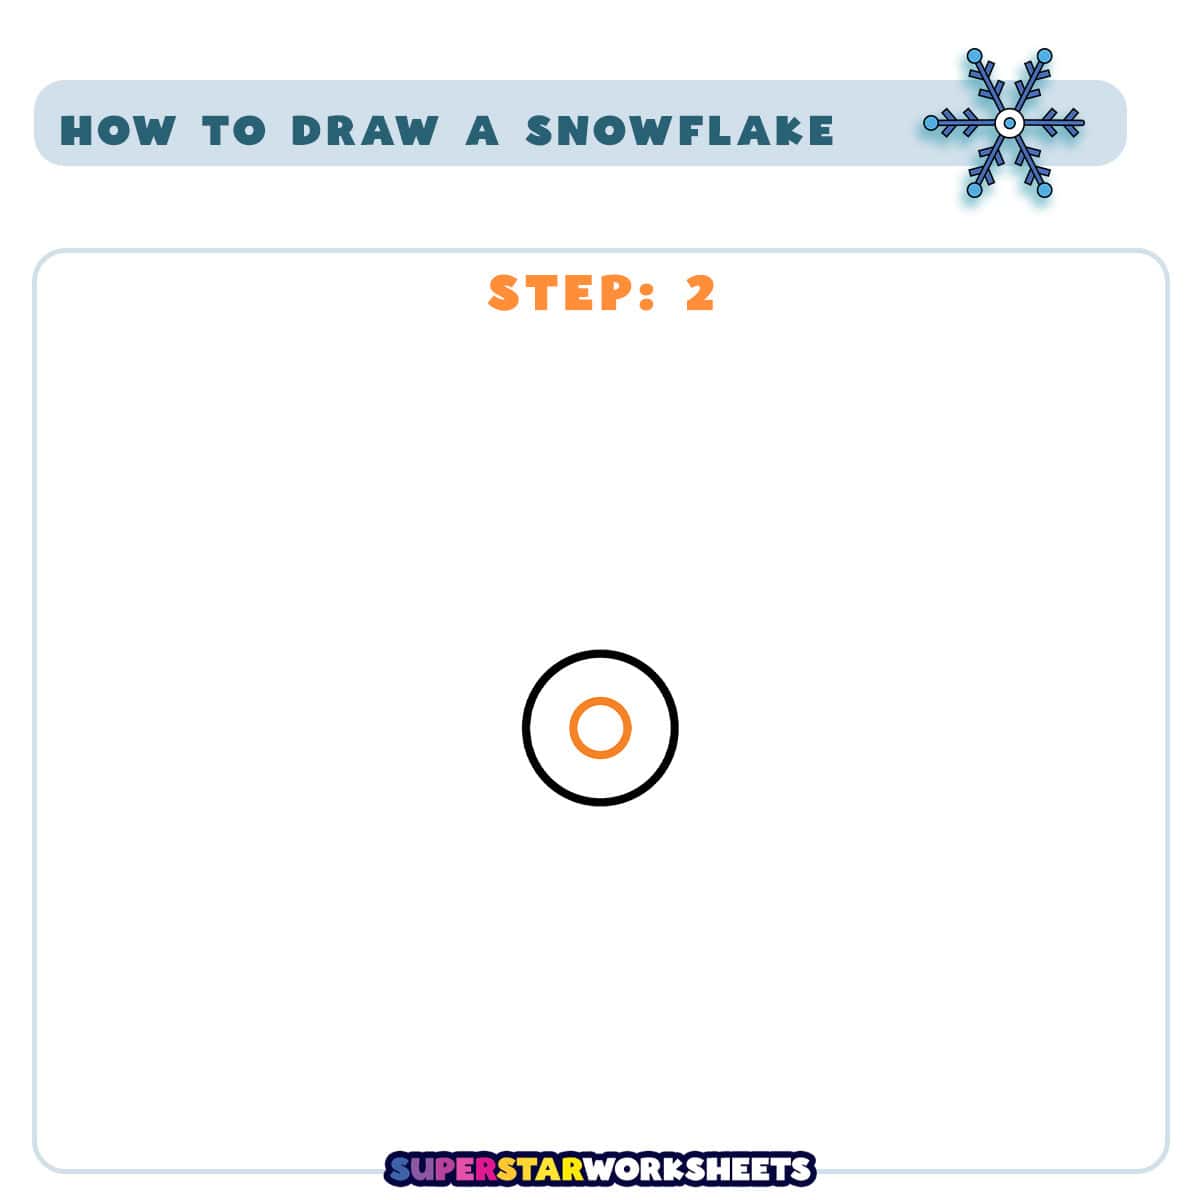
Step 2
Now, let’s add another circle around the first one, creating a ring shape. Draw a larger circle that surrounds your center circle, leaving some space between them. This double-circle design will serve as the center point where all of your snowflake’s arms will connect in the next steps!
How to Draw a Snowflake
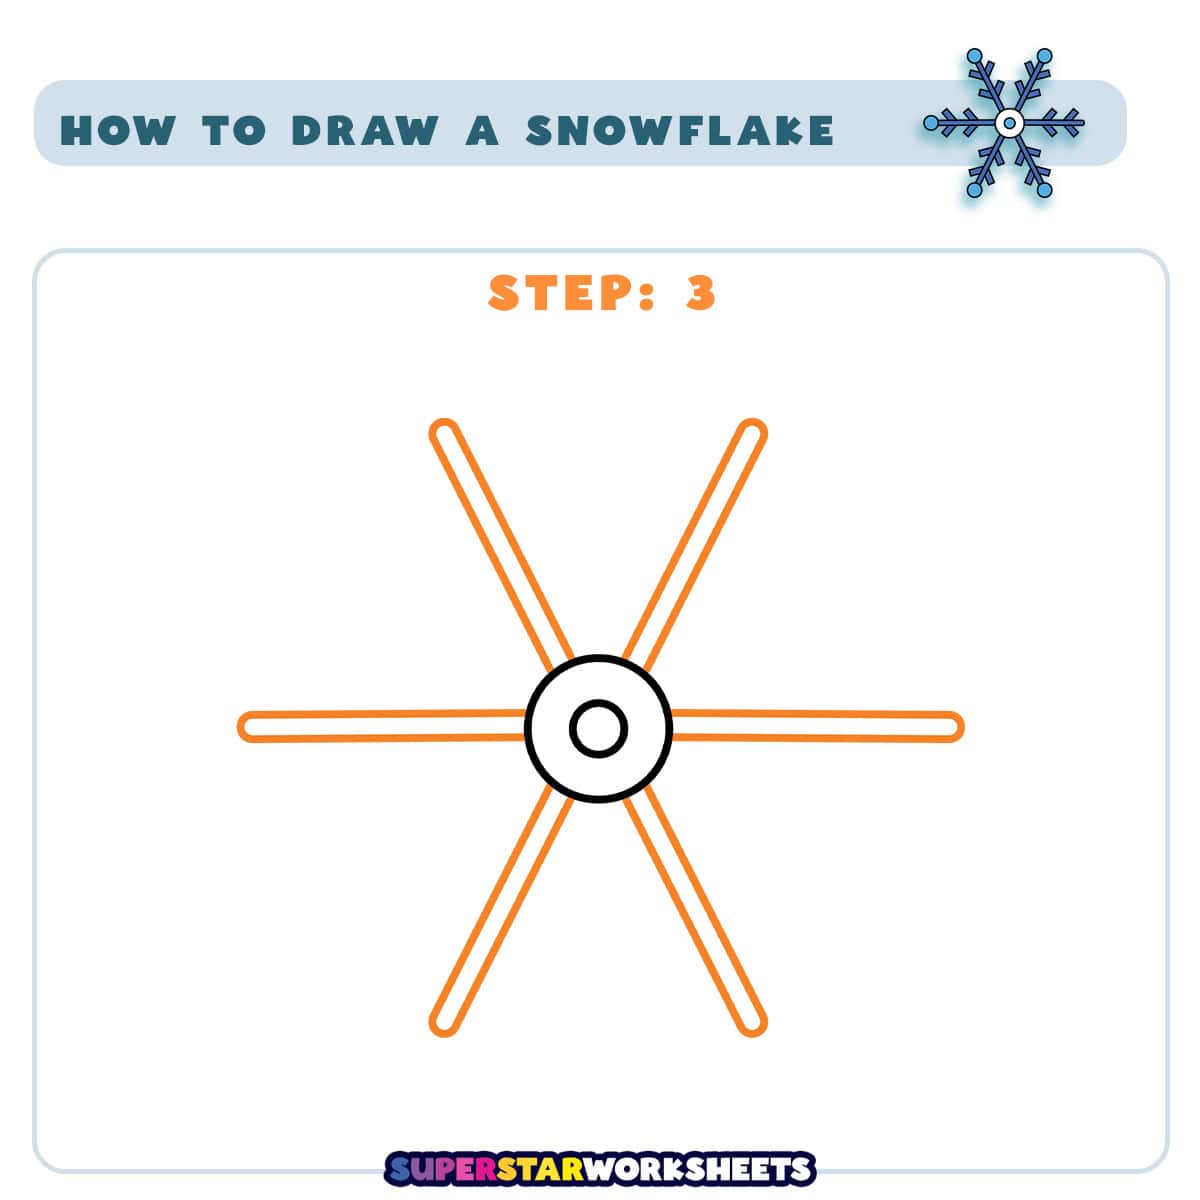
Step 3
Now draw six straight double lines coming out from the center circle. Make sure the lines are rounded at the tip. Space them evenly around the circle, like slices of a pizza. Make sure all the lines are about the same length!

Fun Fact: Did you know that no two snowflakes are exactly alike? Each snowflake has a unique pattern because it forms under slightly different temperature and humidity conditions as it falls through the clouds!
Fun Fact: Real snowflakes always have six sides or six arms. This happens because of the way water molecules freeze together in a hexagonal (six-sided) pattern!
Fun Fact: The largest snowflake ever recorded was 15 inches wide! It fell in Montana in 1887 and was described as being “larger than milk pans.”
How to Draw a Snowflake
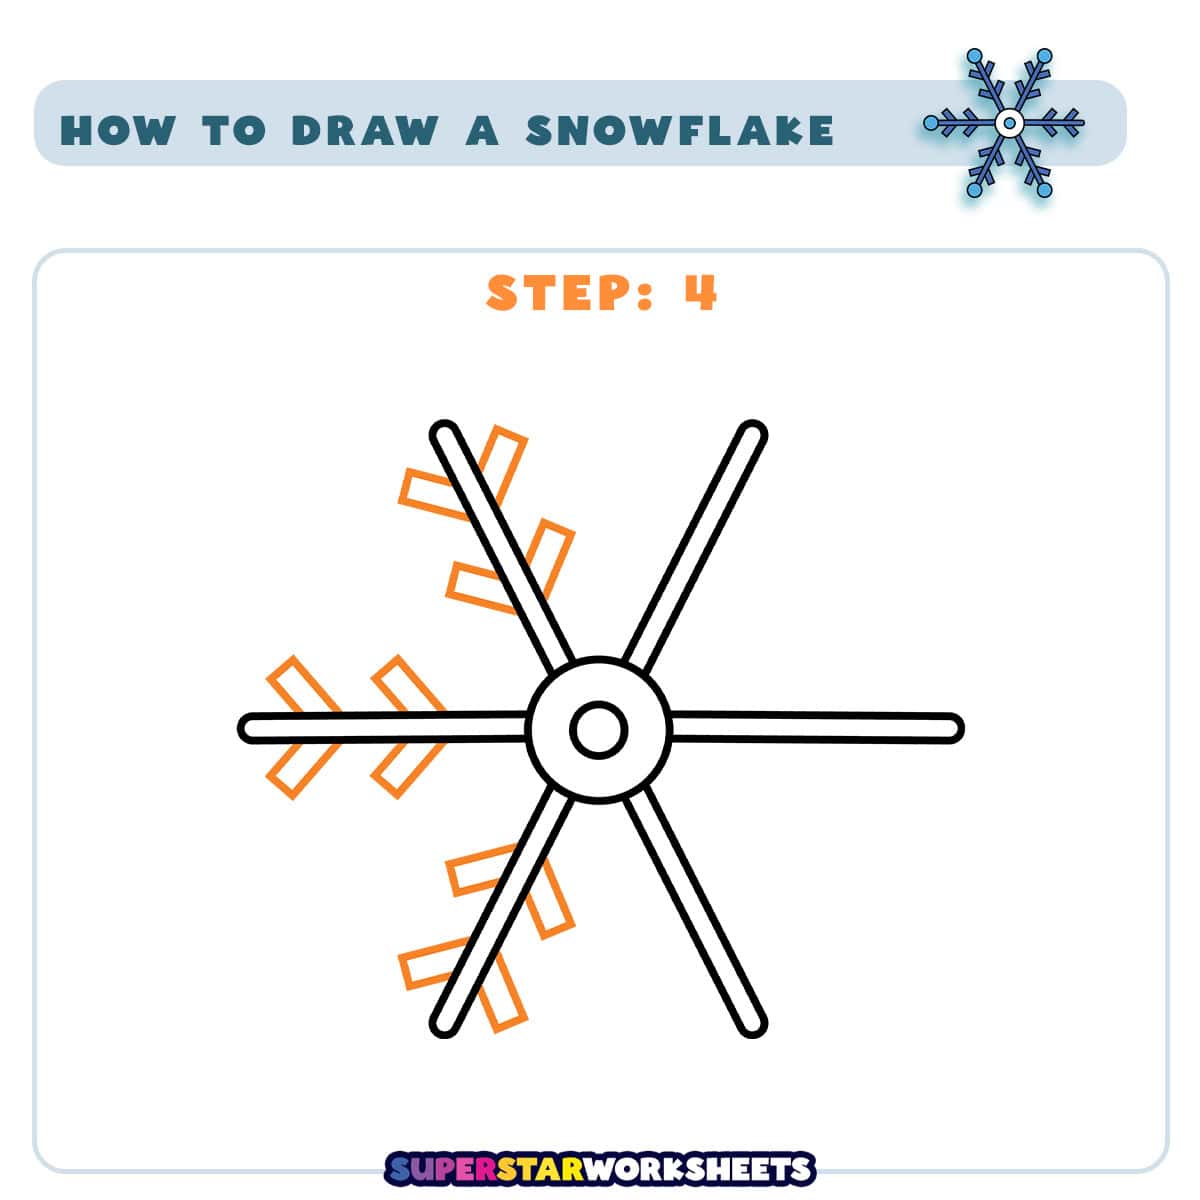
Step 4
Now let’s add smaller branches to make your snowflake look more detailed! On two of the main arms, draw small diagonal lines pointing outward, like tiny branches on a tree. Add 2-3 small lines on each side of these arms. Space them out evenly as you move from the center toward the tips.
How to Draw a Snowflake
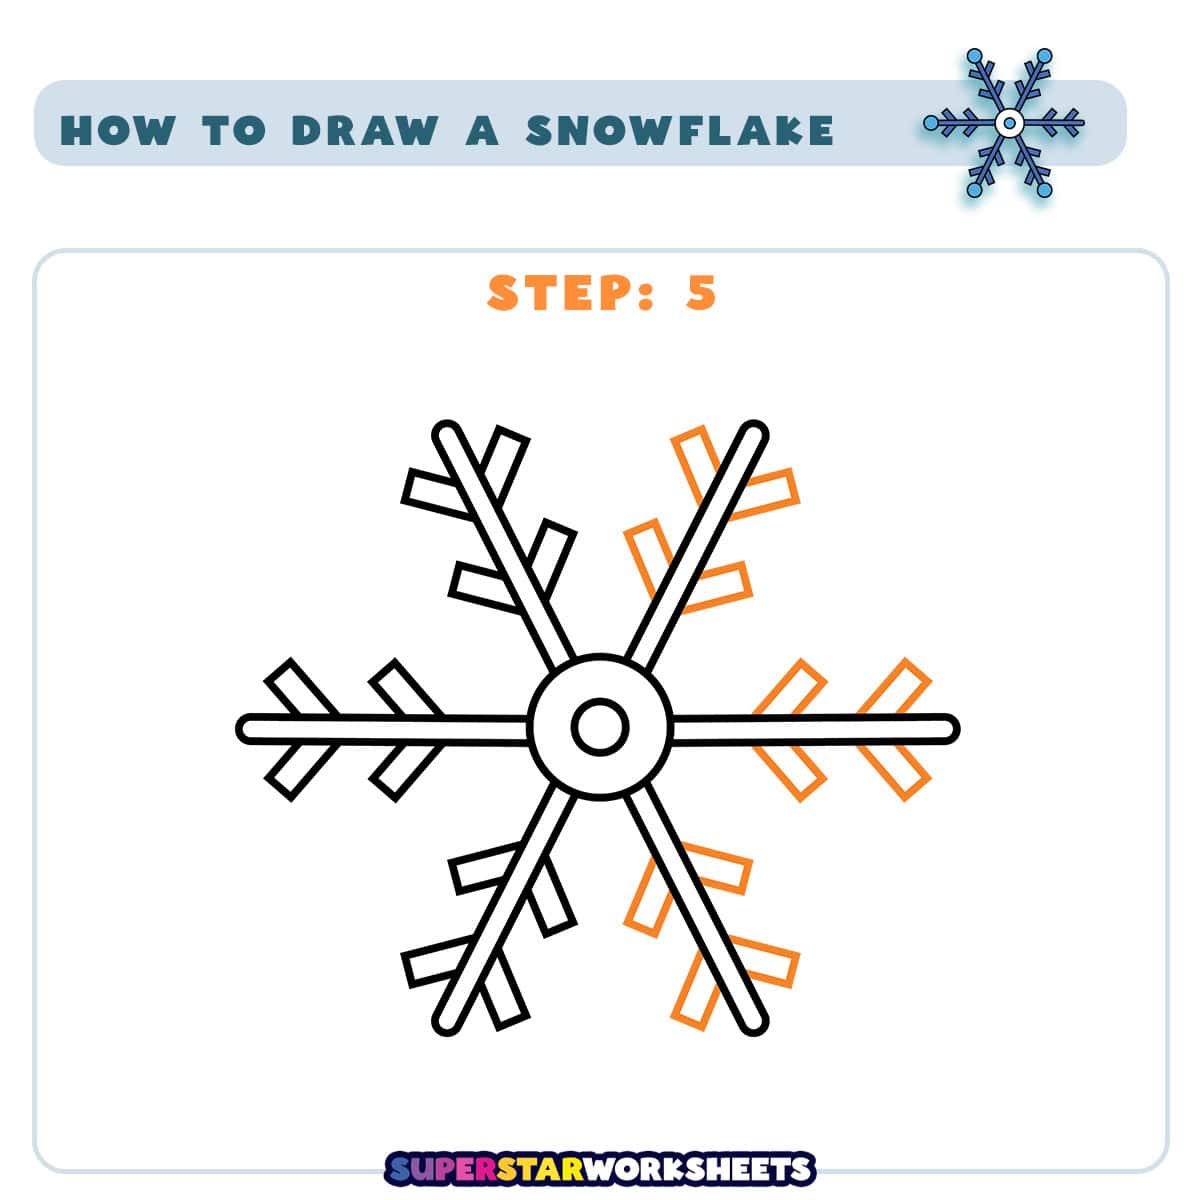
Step 5
Keep adding more branches! Now add the same small diagonal lines to the rest of your snowflake’s arms. Make sure each arm has the same pattern of branches so your snowflake looks symmetrical and balanced. Remember, snowflakes in nature are always symmetrical, so try to make all six arms match!
How to Draw a Snowflake
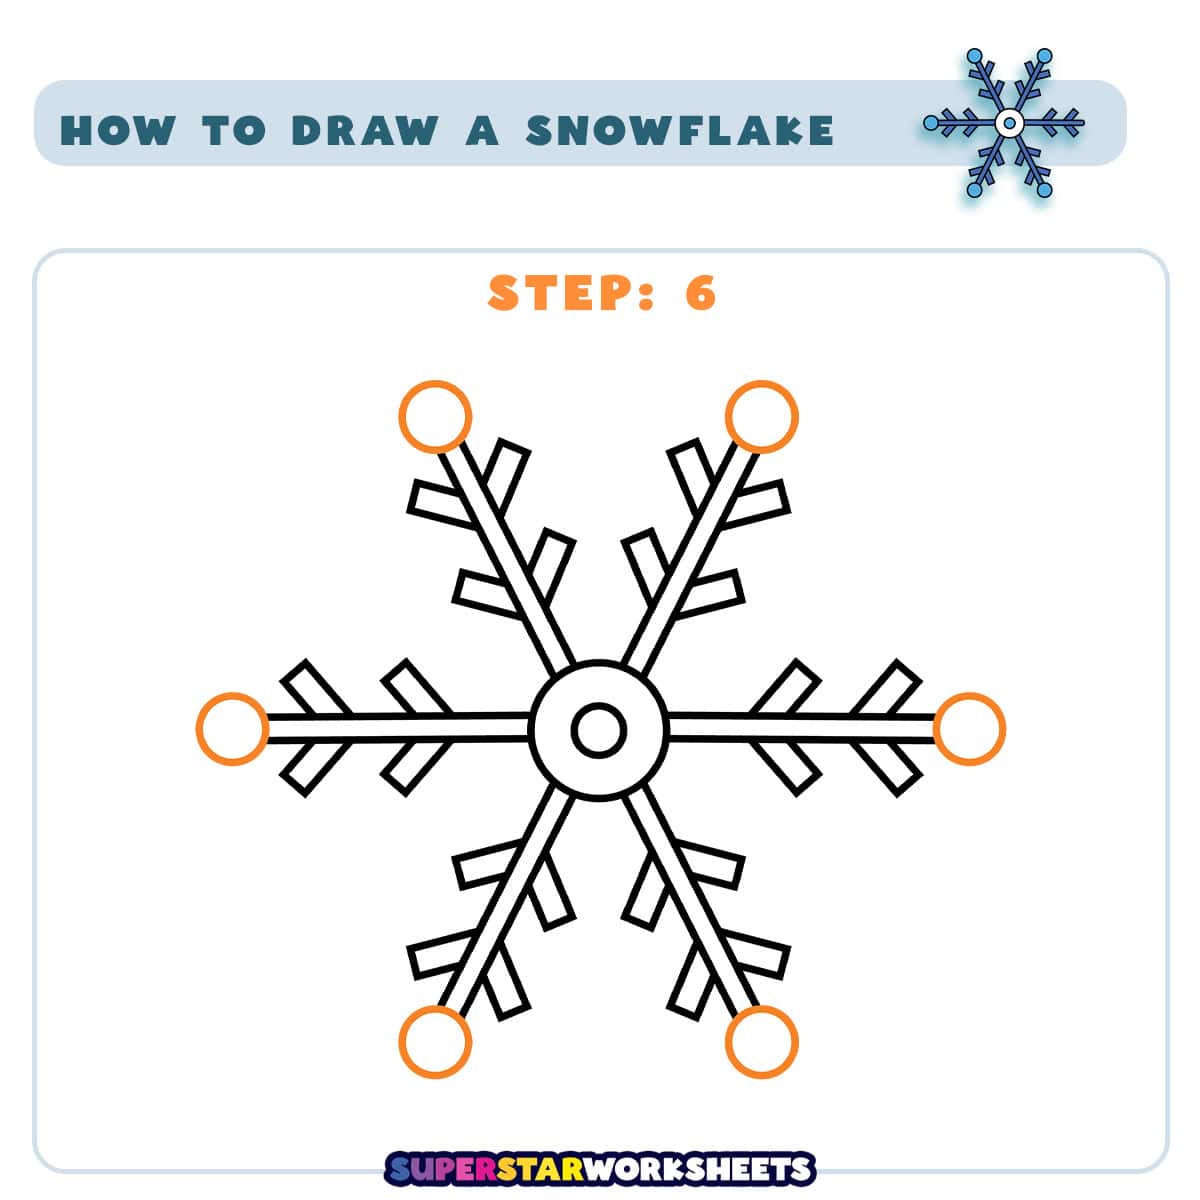
Step 6
Finally, let’s add some finishing touches to make your snowflake sparkle! Draw small circles at the end of each main arm. You can also add tiny circles at the tips of some of the smaller branches if you want. These little details make your snowflake look complete and beautiful. Now your snowflake drawing is finished!
Fun Fact: If you lined up all the snowflakes that fall in one winter storm, they could stretch for thousands of miles! A single storm can drop billions and billions of snowflakes.
Fun Fact: Snowflakes fall from the sky at speeds of 1-4 miles per hour. The speed depends on the size and shape of the snowflake – larger, heavier snowflakes fall faster than small, delicate ones!
If you are needing more drawing printables for your students try out our Directed Drawing Bundle today!
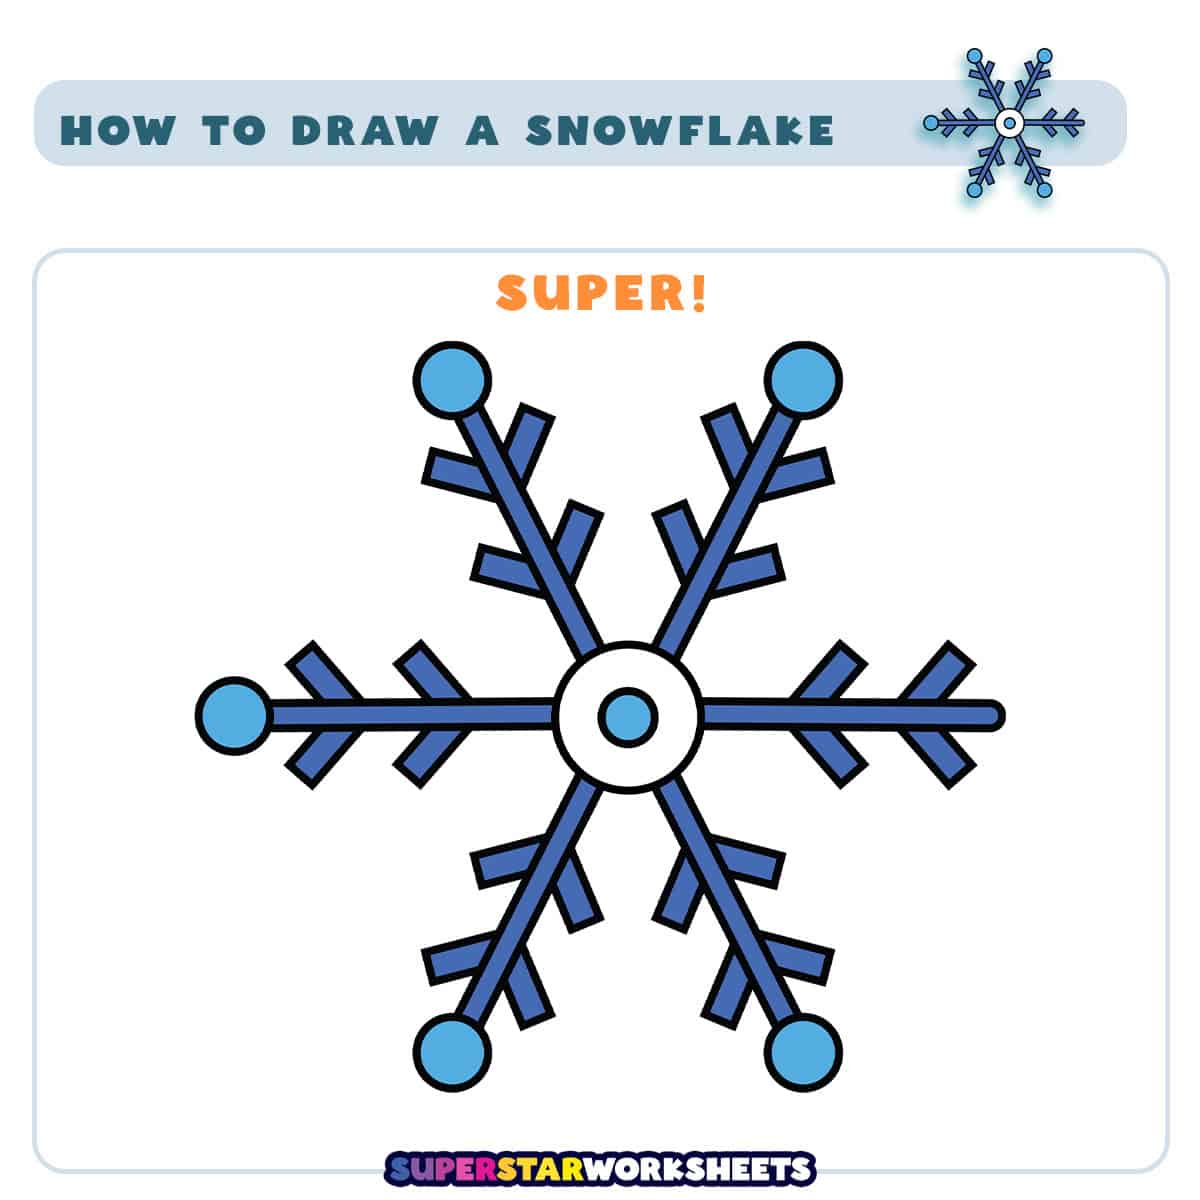
You Drew a Snowflake!
Your simple and festive Snowflake is finished! Now, you can practice drawing snowflakes of all shapes an sizes. Add triangles, hearts, and even stars to your snowflakes.
Try our How to Draw a Snowman tutorial next, and add some winter fun to your drawing. Download and print this snowflake craft, and find fun snowflake templates.
Leave a Reply