

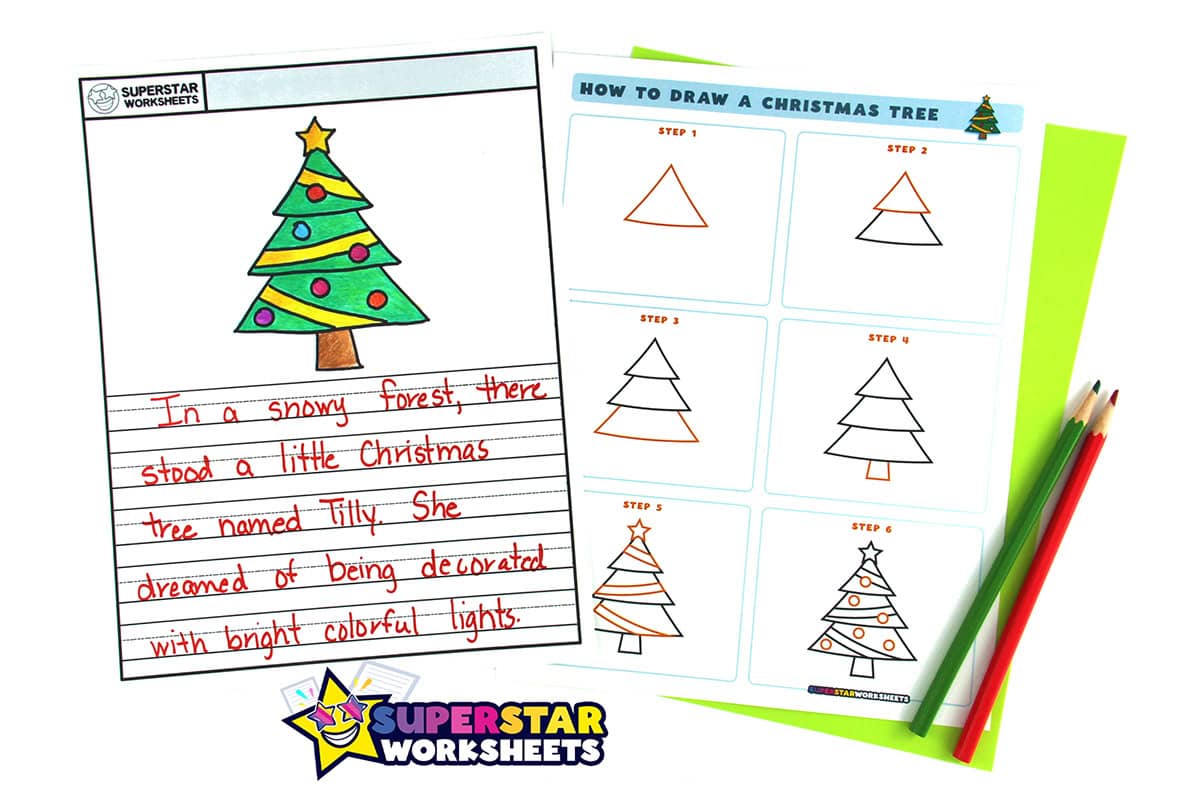
How to draw a simple and easy Christmas Tree for kids. This step-by-step Christmas Tree drawing tutorial will help your students create their own holiday tree in 6 easy steps! Featuring simple black outline drawings and illustrations, our Christmas Tree drawing guide is quick and easy for beginners. Download our printable directed drawing worksheet or follow the full drawing tutorial below.
Christmas Tree Step-by-Step Directed Drawing
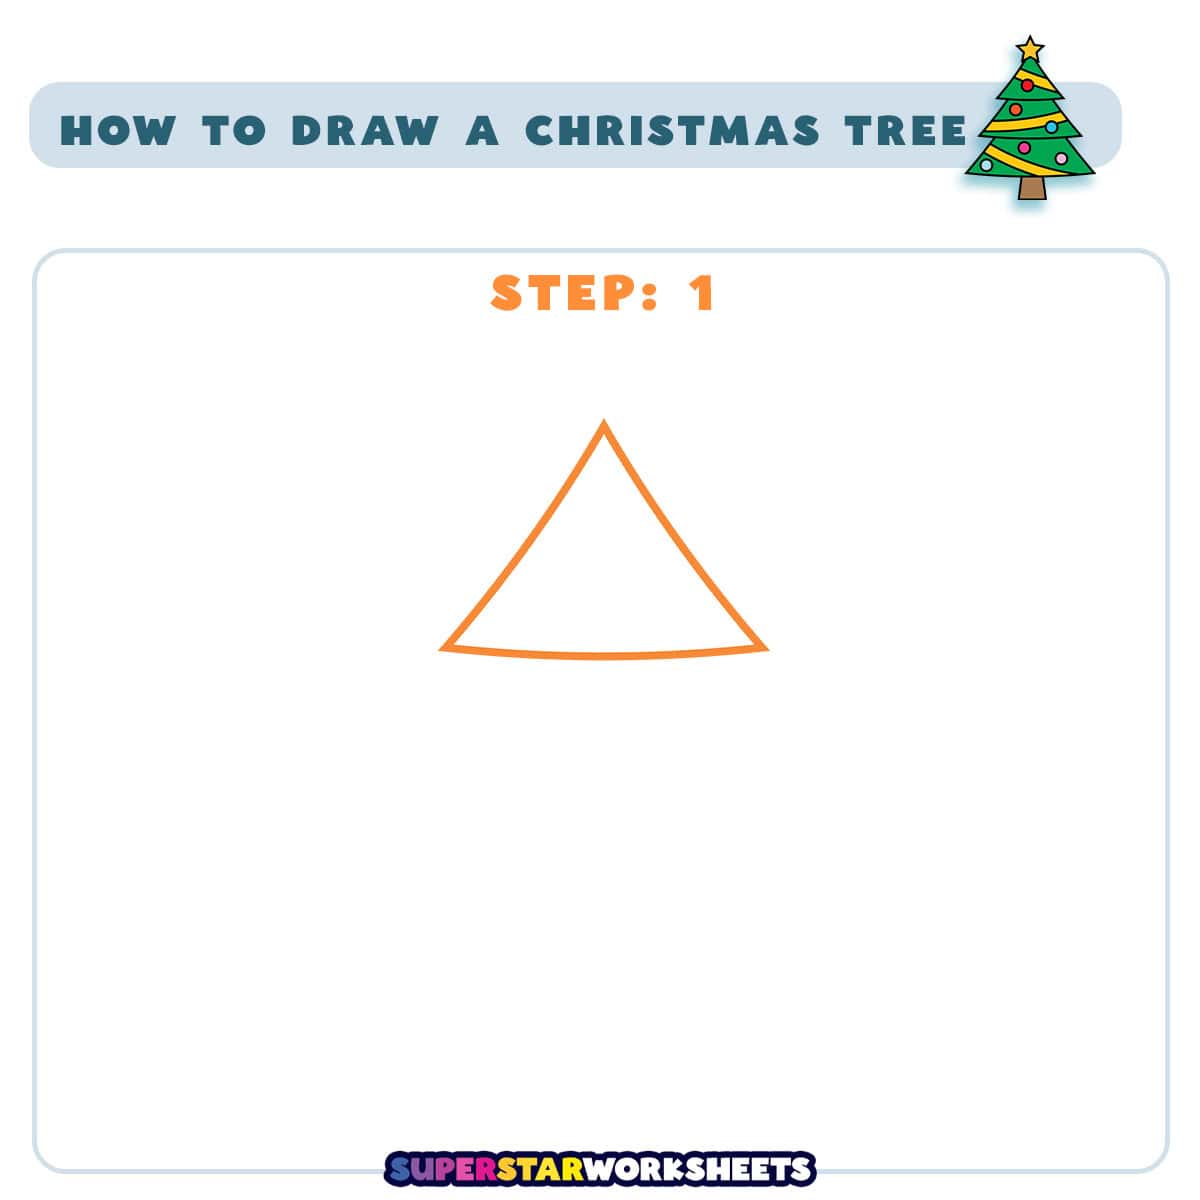
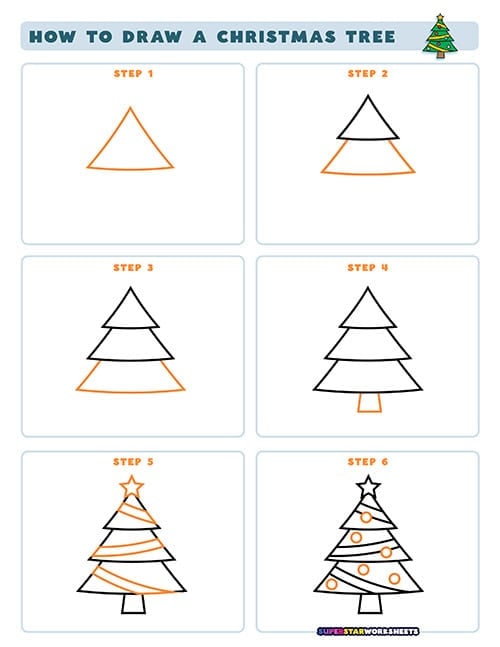
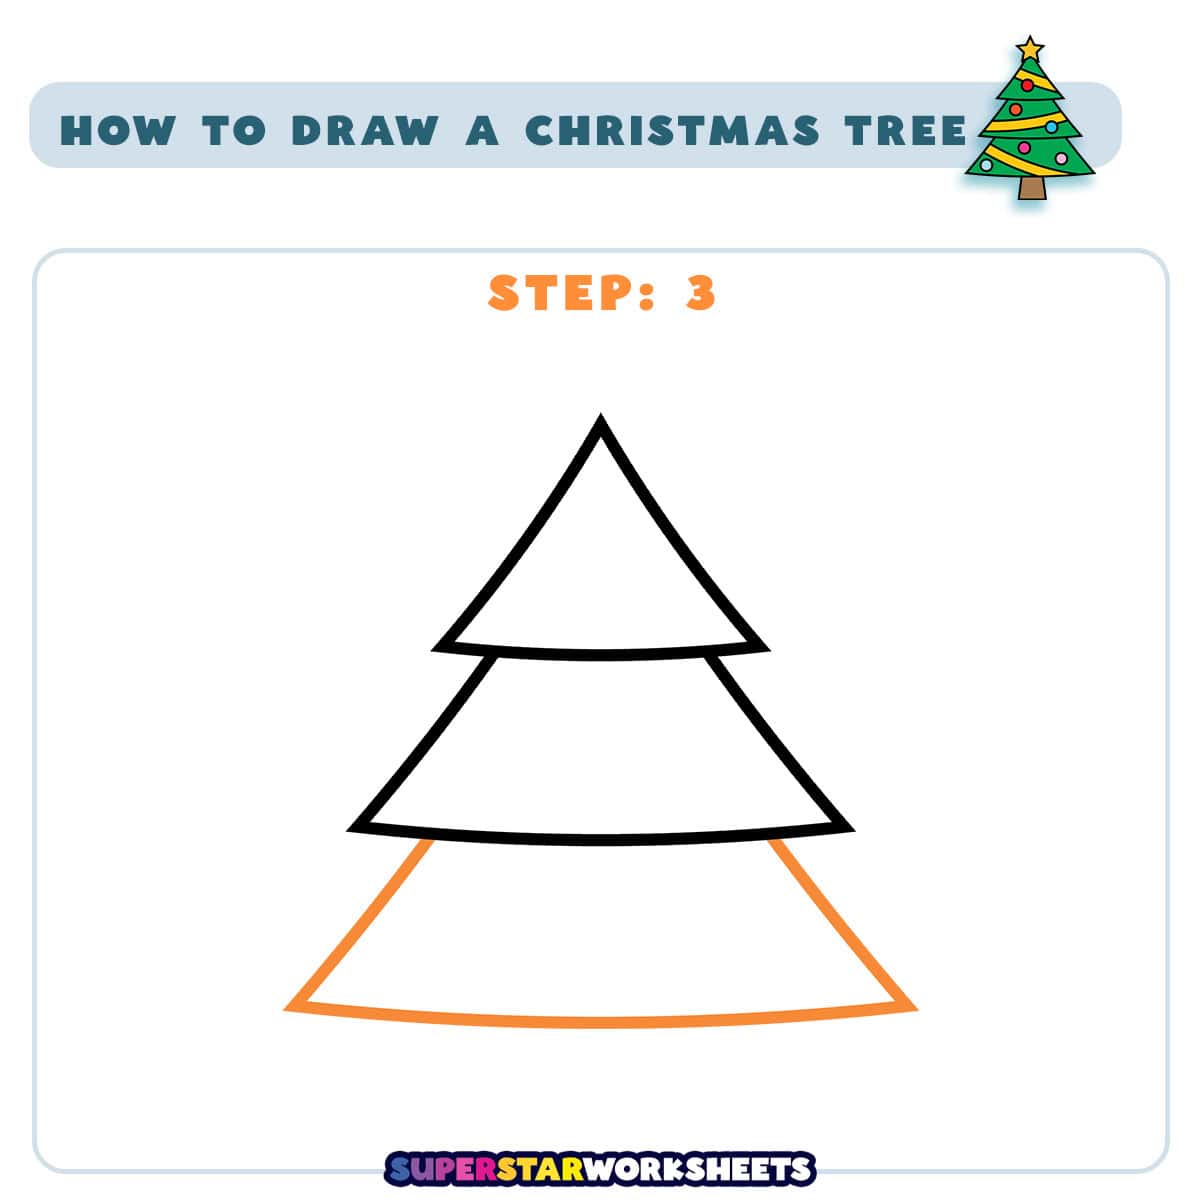
How to Draw a Christmas Tree
Step 1
Using a pencil (so you can erase), let’s start our Christmas tree with a simple triangle! Draw a triangle pointing up – this will be the top part of your tree. Make sure your triangle isn’t too small or too big, as we’ll be adding more shapes below it.

How to Draw a Christmas Tree
Step 2
Now, let’s add another triangle shape below the first one, but make it a bit wider. Think of it like the tree is wearing layers, with each layer getting bigger as we go down. This helps give our tree that perfect Christmas shape!
How to Draw a Christmas Tree
Step 3
Time to add the bottom layer of our tree! Draw one more triangle at the bottom, making it the widest of all. This gives our tree a strong base and makes it look full and healthy. Remember to make this triangle bigger than the other two.
Fun Fact: Did you know that the tradition of Christmas trees started in Germany in the 16th century? People would bring evergreen trees into their homes during winter to remind them that spring would come again!
Fun Fact: Real Christmas trees usually take 7-10 years to grow to the perfect size for decorating in our homes!
Fun Fact: The world’s tallest cut Christmas tree was 221 feet tall!
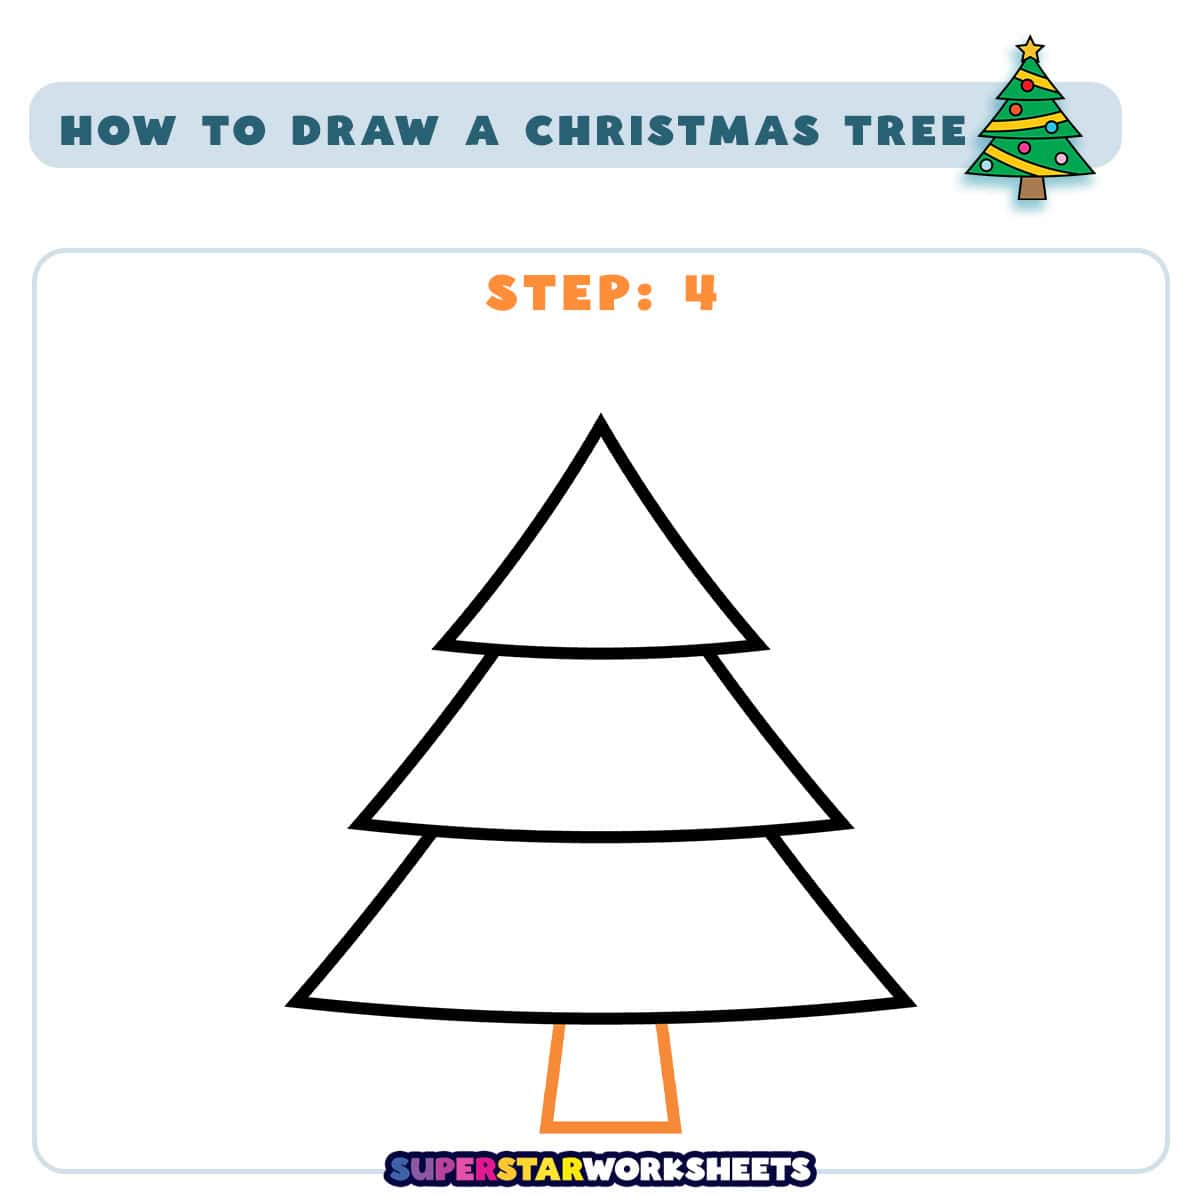
How to Draw a Christmas Tree
Step 4
Every Christmas tree needs a trunk to stand on! Add a small rectangle at the bottom of your tree – this is the trunk that holds your tree up straight and tall. Make it wide enough to support your tree but not too wide.
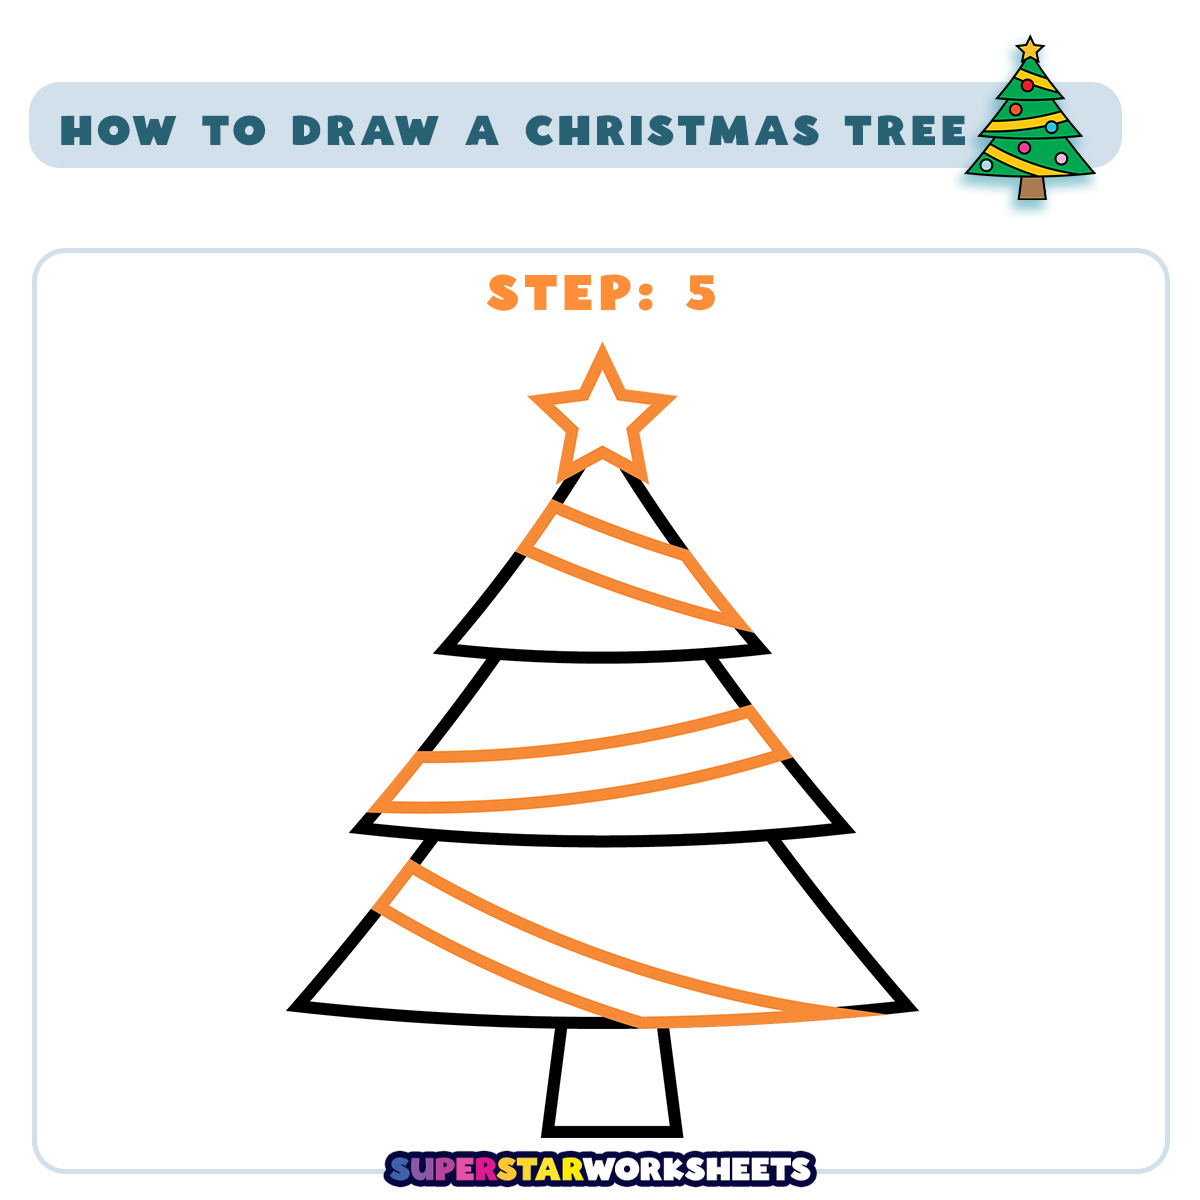
How to Draw a Christmas Tree
Step 5
Let’s make our tree festive by adding curvy lines across each section. These lines represent the tree’s decorations. Don’t forget to add a star on top – it’s the tree’s crown! Draw your lines curving slightly upward to make the tree look more natural.
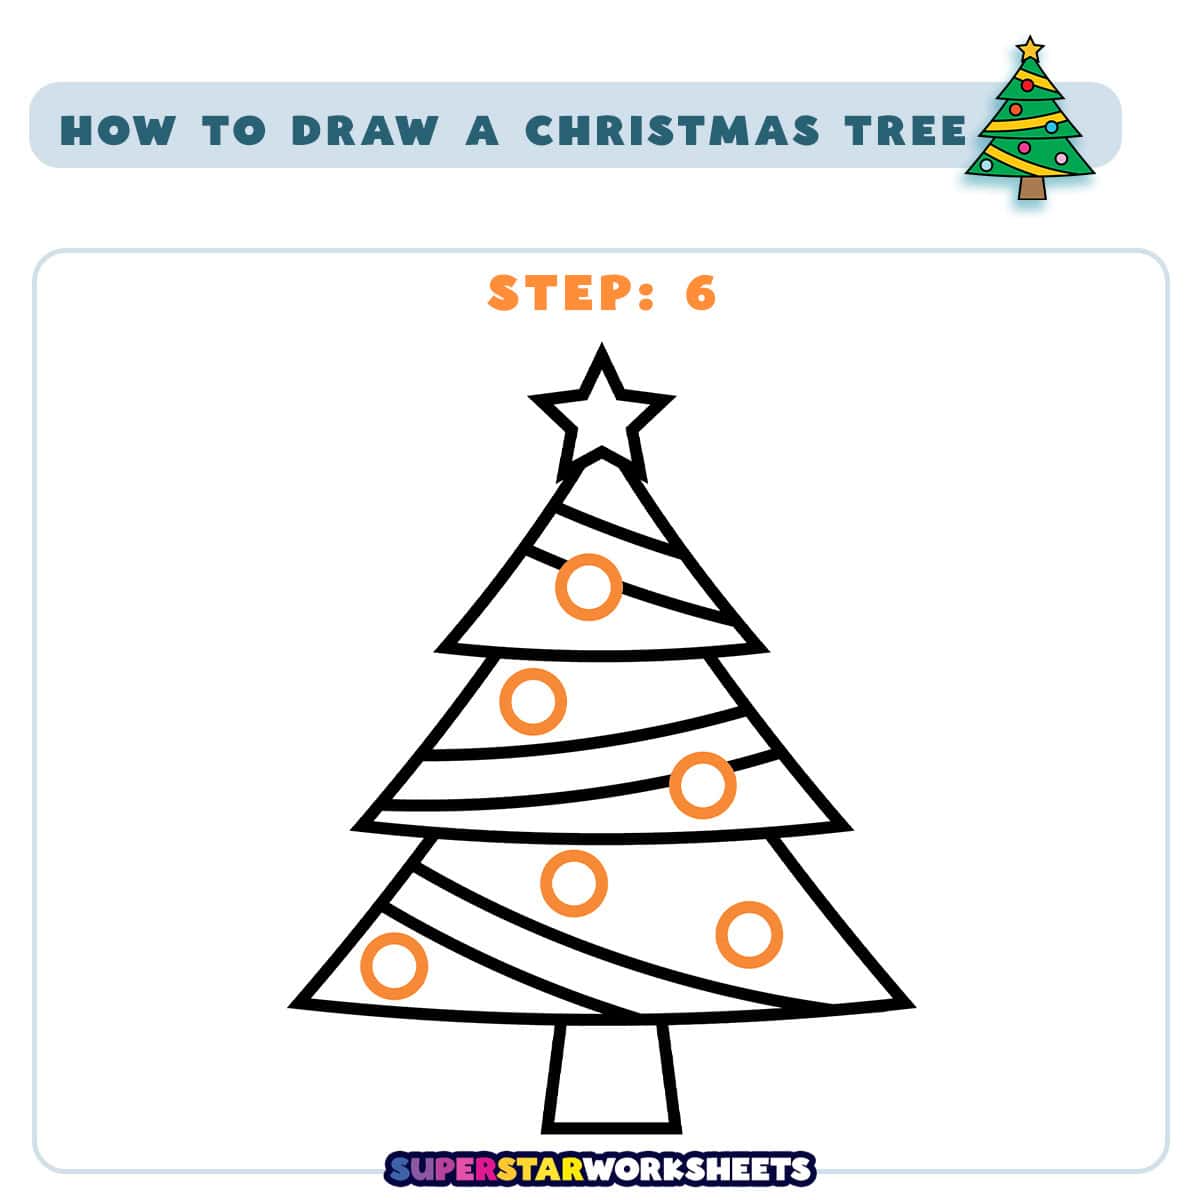
How to Draw a Christmas Tree
Step 6
Finally, let’s add some ornaments to make our tree sparkle! Draw small circles on your tree to represent ornaments. You can space them out evenly or place them randomly – there’s no wrong way to decorate your Christmas tree! Add as many as you like to make your tree look magical.
Fun Fact: If you lined up all the Christmas trees sold in North America in a year, they would circle the Earth’s equator more than 4 times!
Fun Fact: The star on top of the Christmas tree traditionally represents the Star of Bethlehem that guided the wise men to baby Jesus.
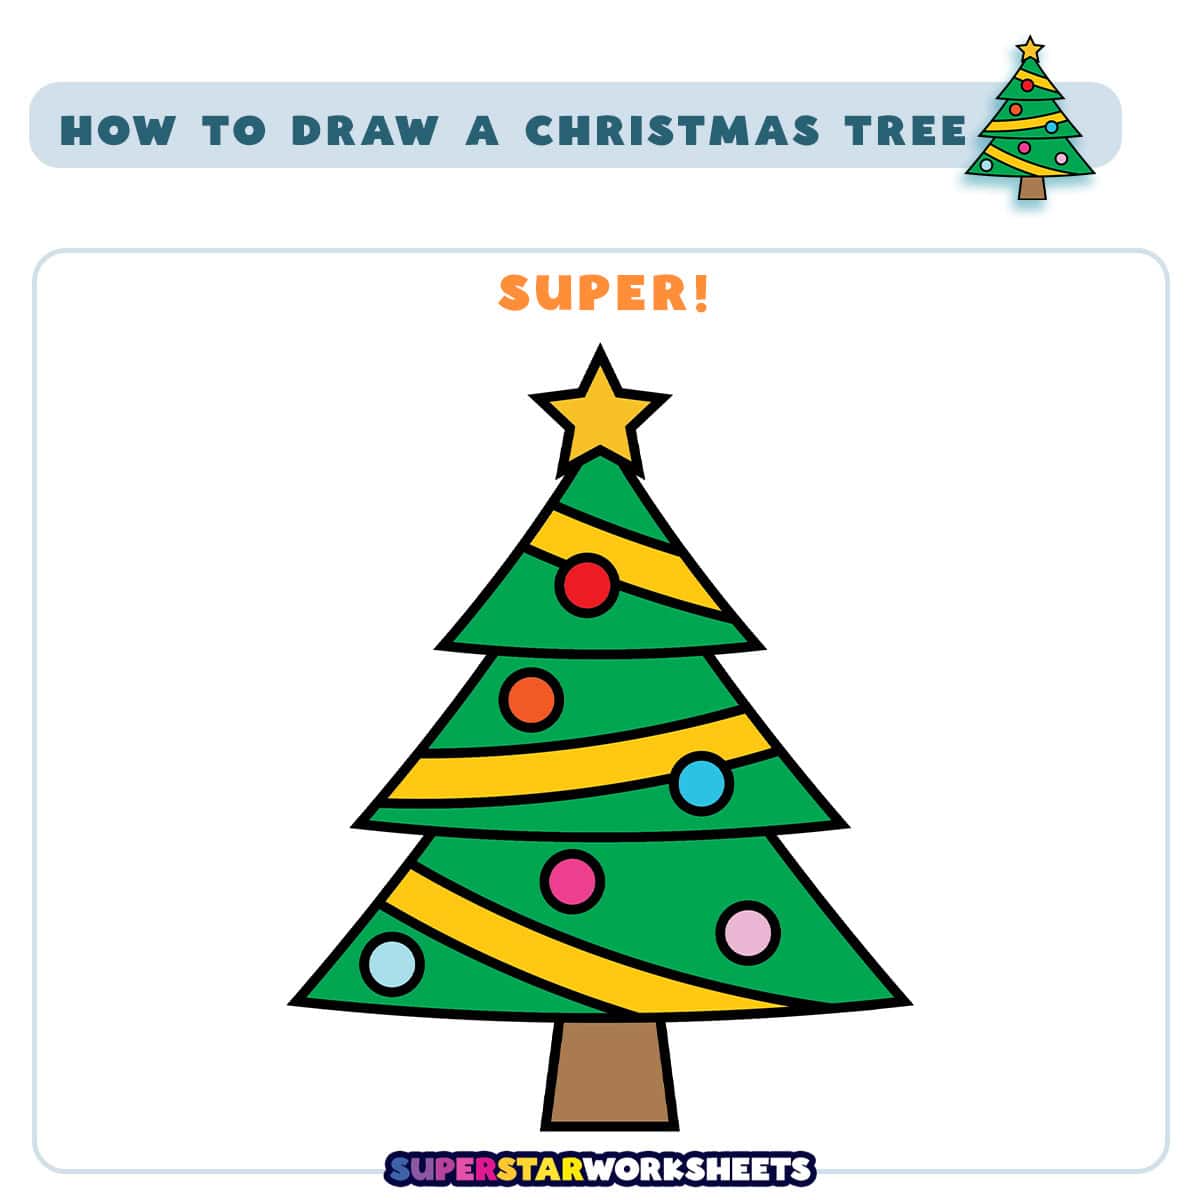
You Drew a Christmas Tree!
Your simple and festive Christmas Tree is finished! Now, you can practice drawing holiday trees of all sizes, and you can color them in with bright Christmas colors. You could even make a whole Christmas tree village!
Try our How to Draw a Snowman tutorial next, and add some winter fun to your drawing. Download and print Christmas Tree Templates, and find fun Christmas Tree Coloring Pages here.
Leave a Reply