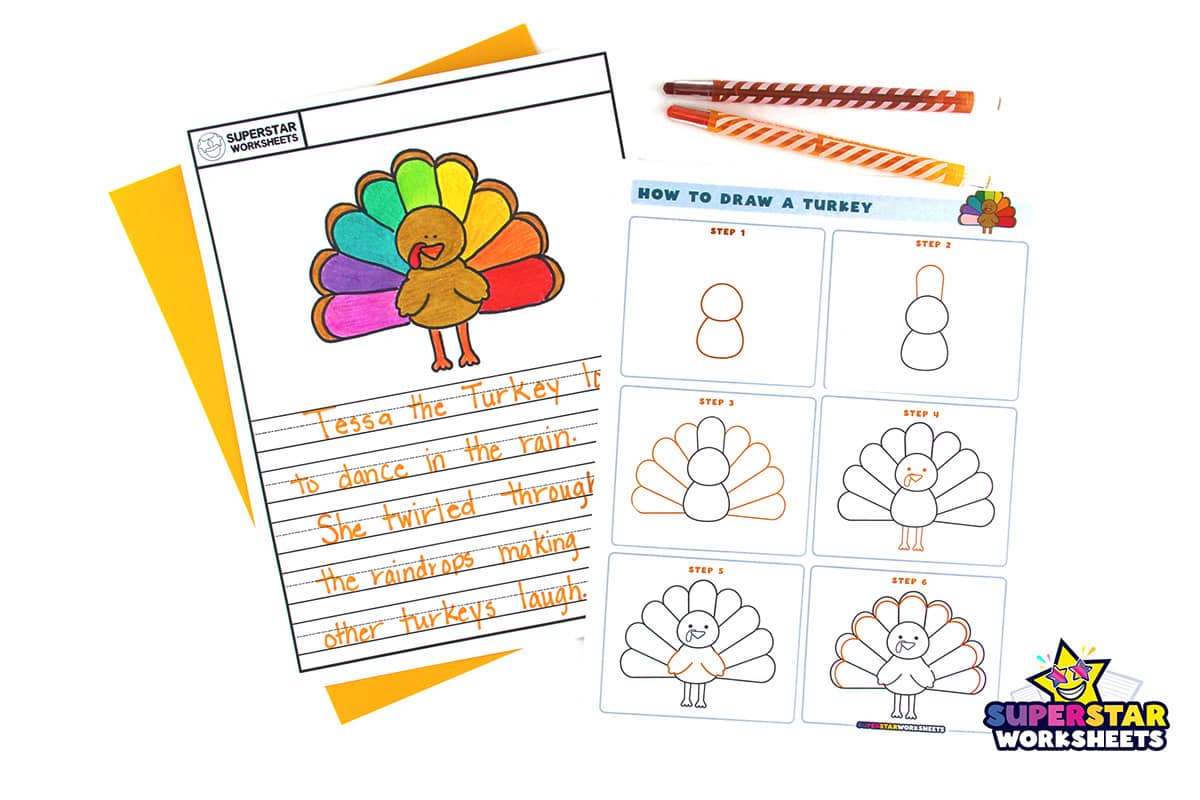
How to draw step by step an easy How to Draw a Turkey for kids. This Thanksgiving Turkey drawing tutorial will help your students create their own feathered turkey in 6 easy steps! Featuring simple black outline drawings and illustrations, our How to Draw a Turkey drawing guide is quick and simple for beginners. Download our printable directed drawing worksheet or follow the full drawing tutorial below.

Turkey Step-by-Step Directed Drawing
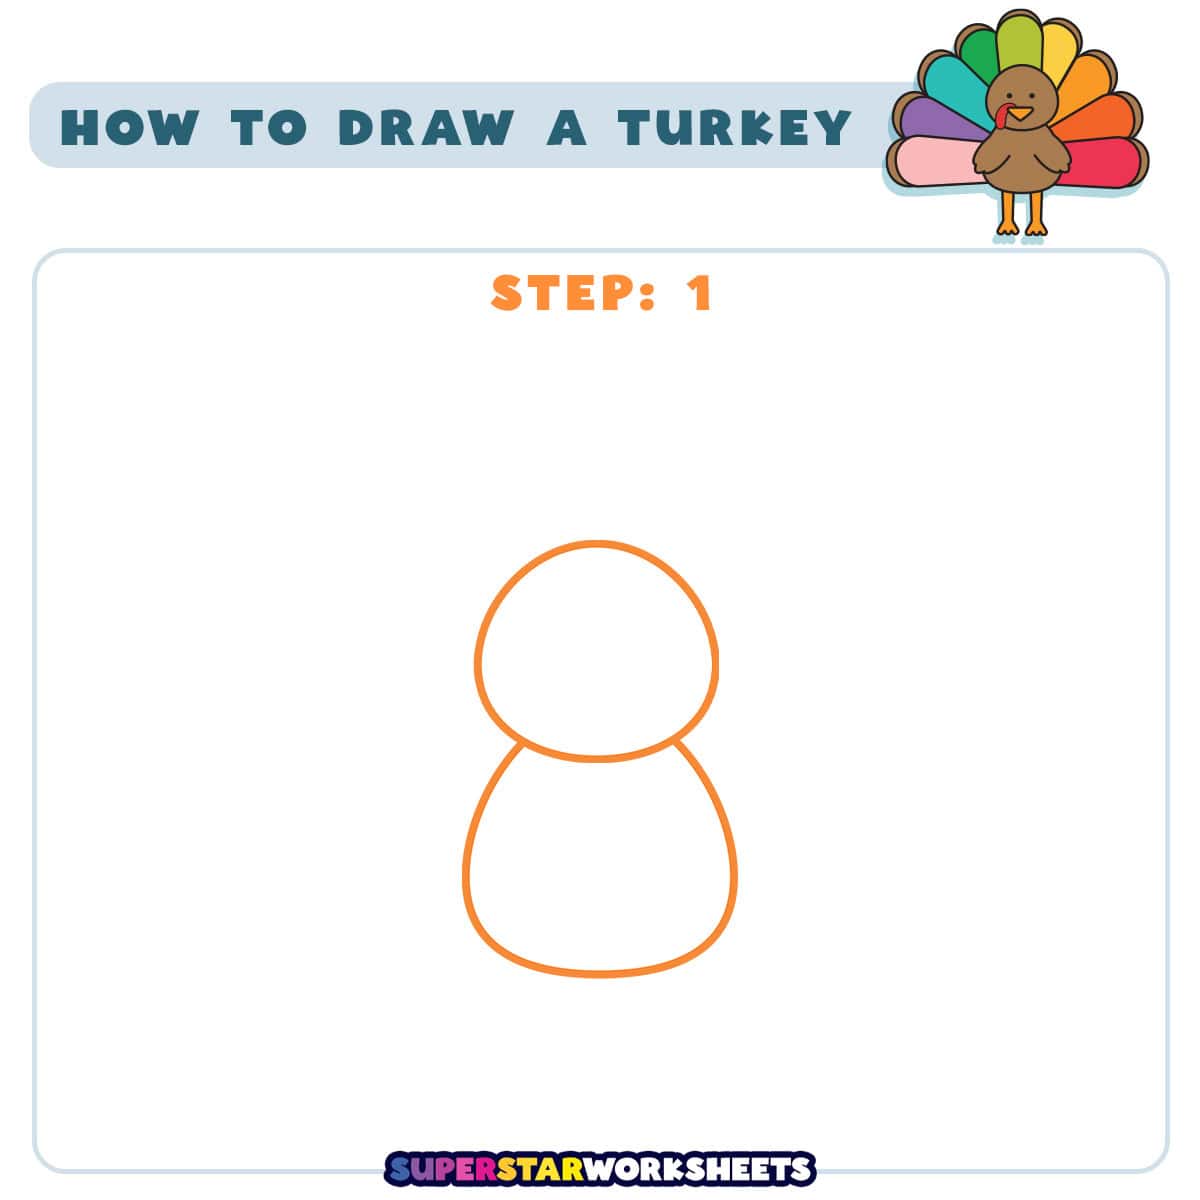
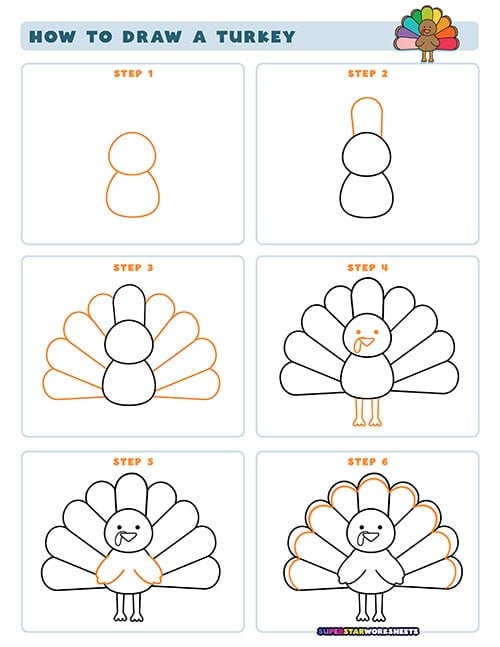
Let’s start our turkey by drawing two circles, one on top of the other. The top circle will be smaller and will become the turkey’s head, while the larger bottom circle will be its body. Make sure to leave some space below for the legs later on. For more turkey themed activities try out our Turkey Templates.
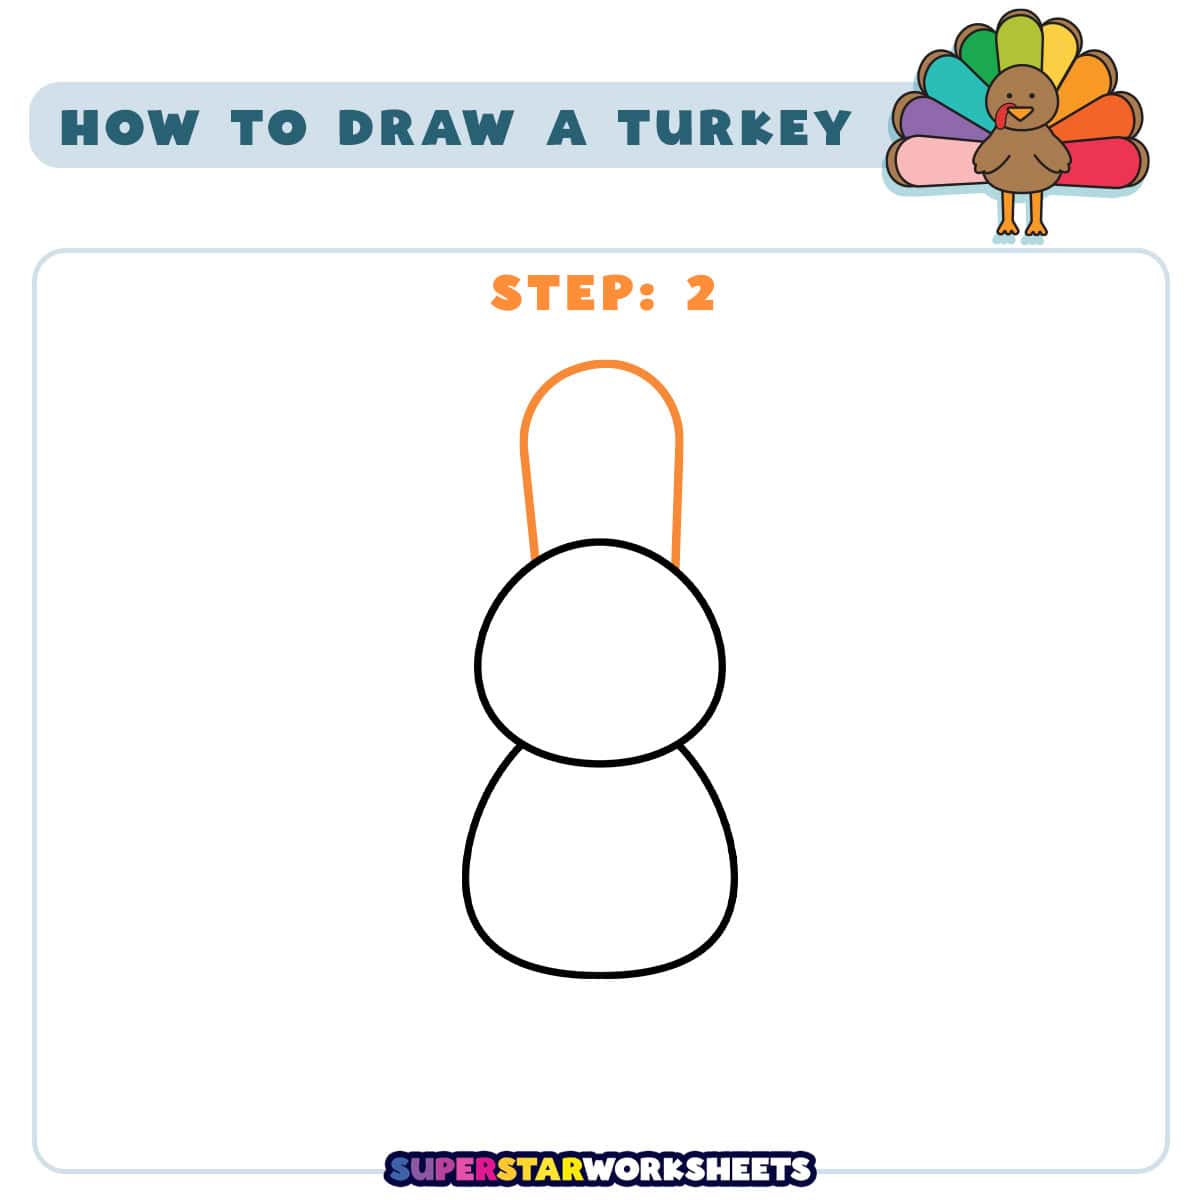
Now, let’s add a curved line on top of the head to create the turkey’s wattle. This is the fleshy bit that hangs from the turkey’s neck. Draw a U-shaped curve that starts and ends at the sides of the head circle. Pair this with more fun Thanksgiving Turkey crafts for a festive holiday experience.
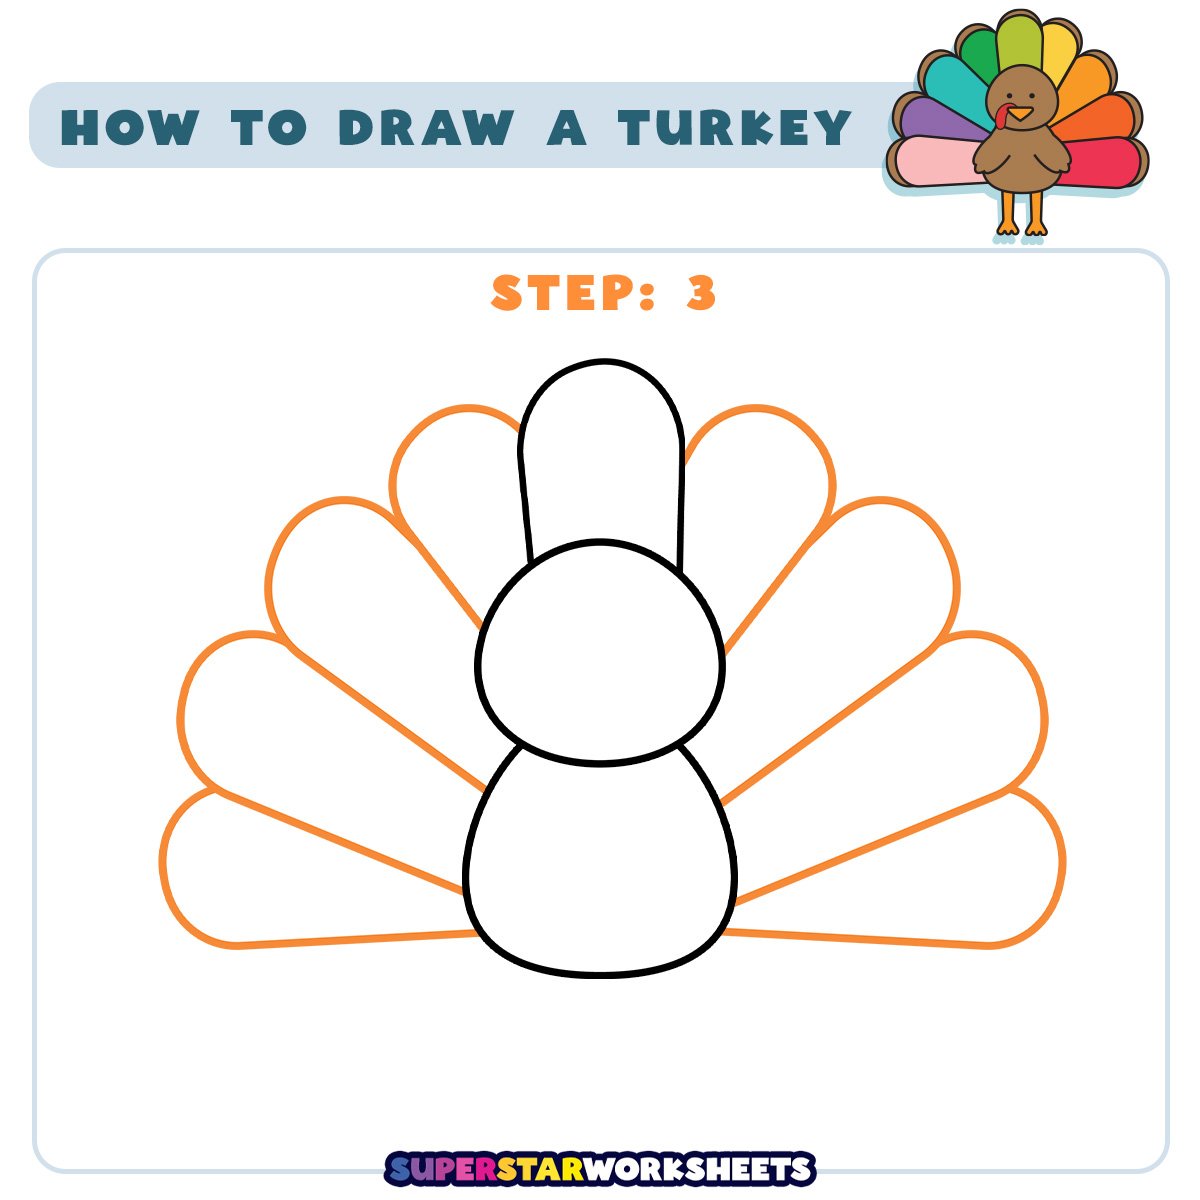
It’s time to give our turkey its beautiful tail feathers. Draw five curved lines fanning out from the back of the body circle. Make them longer in the middle and shorter on the sides to create a fan shape. Pair your new drawing skills with our printable Turkey Coloring Pages!
Fun Fact: A turkey’s wattle can change color depending on its mood and health. When a turkey is excited or trying to attract a mate, its wattle can turn bright red!
Fun Fact: Turkeys have excellent eyesight and can see in color. Their eyes are positioned on the sides of their head, giving them a wide field of vision to spot predators.
Fun Fact: Turkeys are great at swimming!
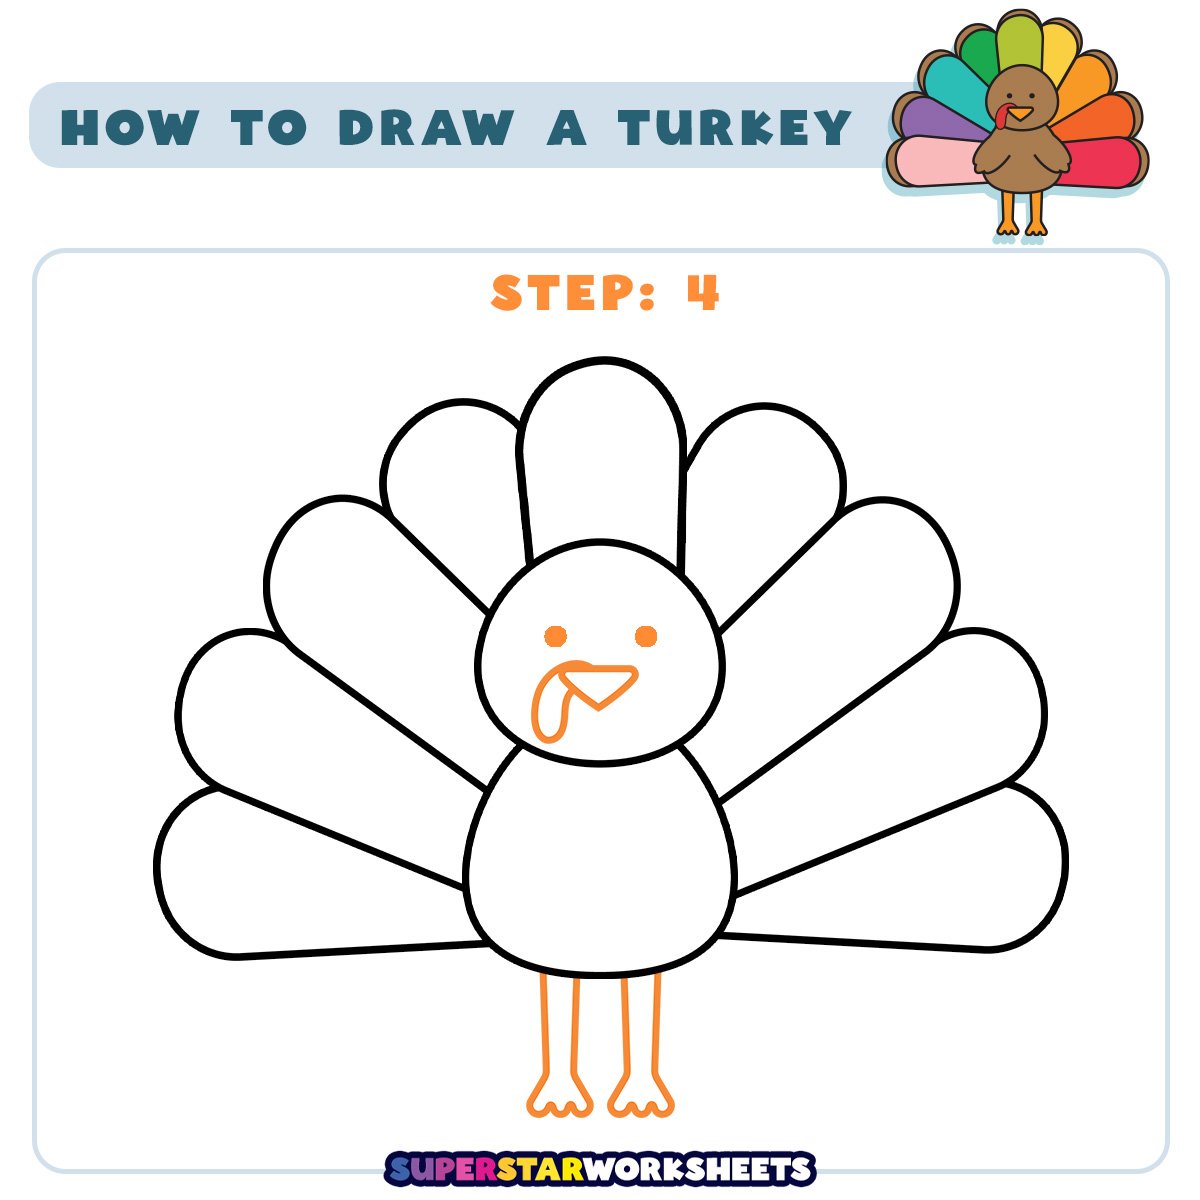
Let’s bring our turkey to life by adding some details. Draw two small circles for eyes and a little curved beak on the head. For the body, add two thin legs coming down from the bottom of the body circle, and don’t forget to add some toes at the end of each leg.
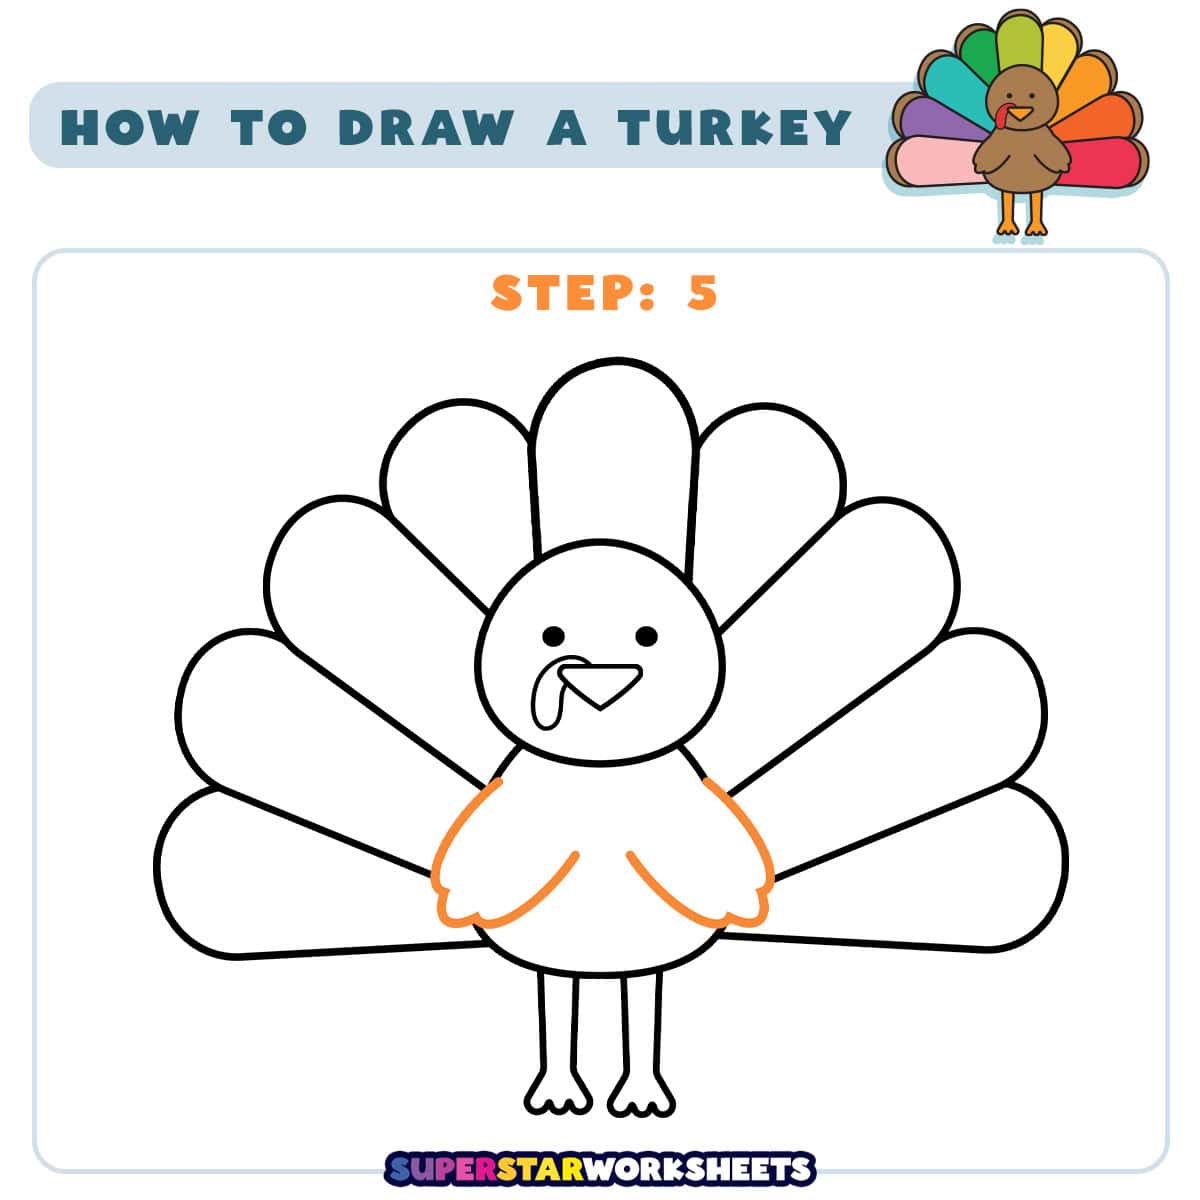
Now we’ll make our turkey look more rounded and fluffy. Add curved lines inside the tail feathers to give them more shape. Draw a wing on the side of the body using a curved line, and add some feather details to make it look more realistic. Teachers! If you are looking for more free crafts try our Turkey Disguise Project.
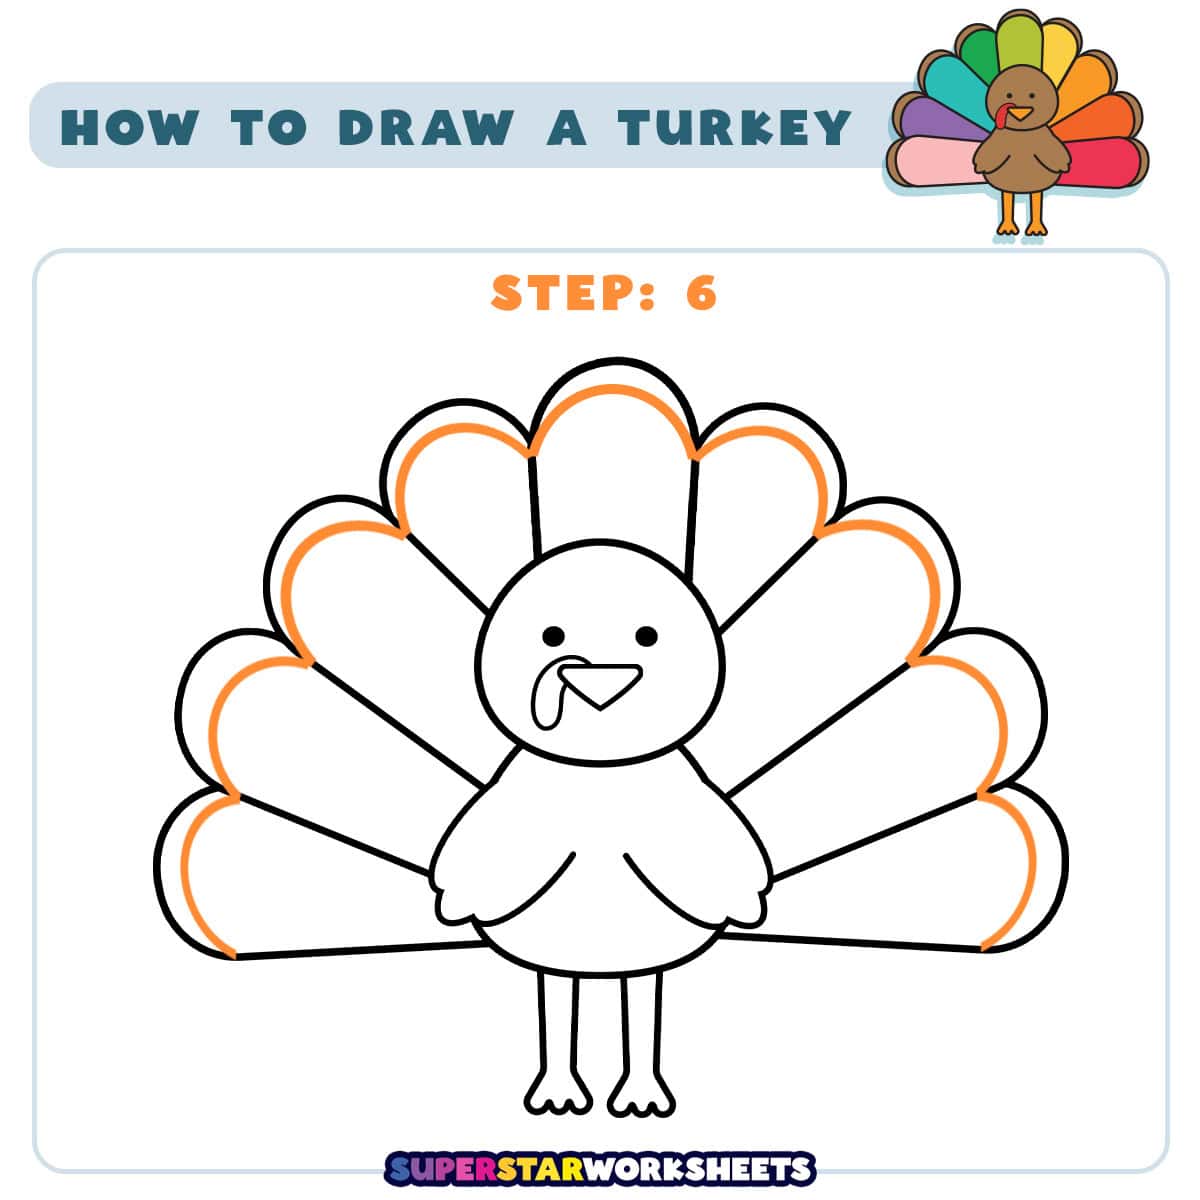
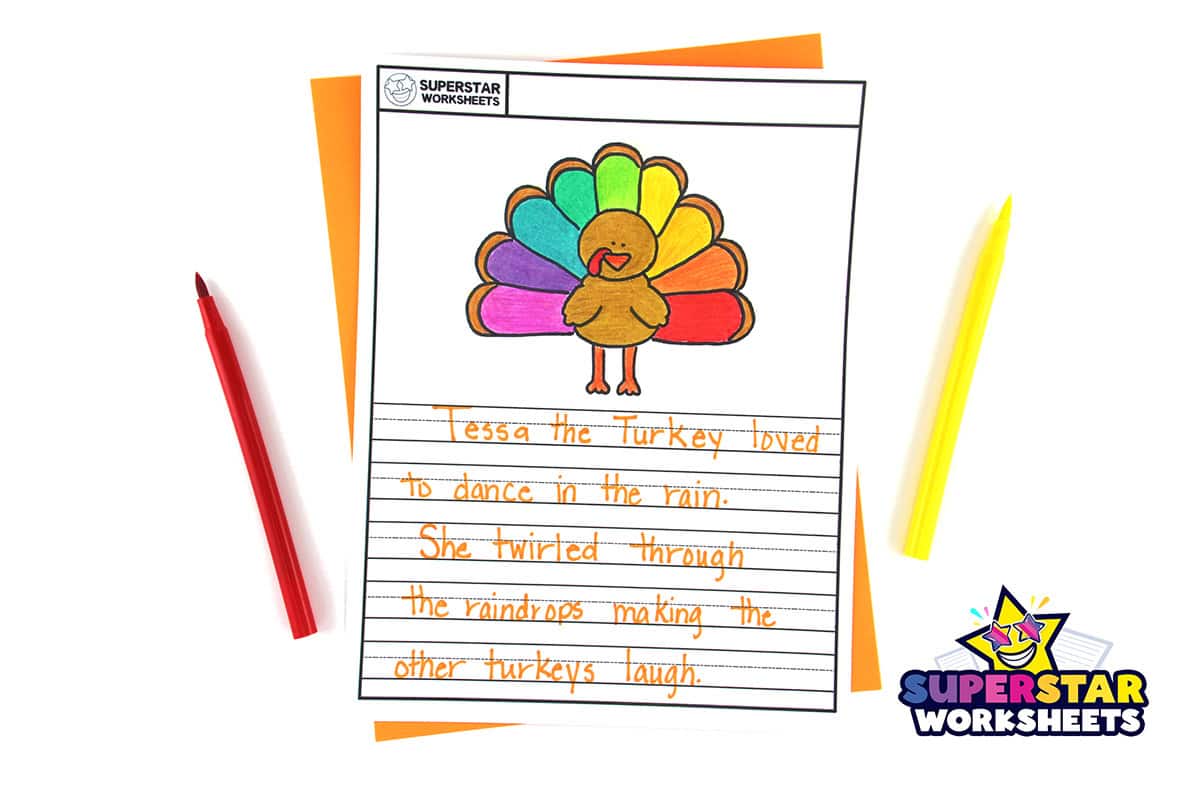
For the final touch, let’s color in some parts of our turkey to make it stand out. Color the beak, legs, and feet orange. Add some color to the tail feathers too, using different colors for each feather to make a colorful fan. Teachers! If you are wanting more FREE drawing printables take a look at our Finish the Drawing Printables.
Fun Fact: Wild turkeys can actually fly, although they’re not known for long-distance flights. They can fly up to 55 miles per hour for short distances!
Fun Fact: Turkeys can run up to 25 miles per hour!
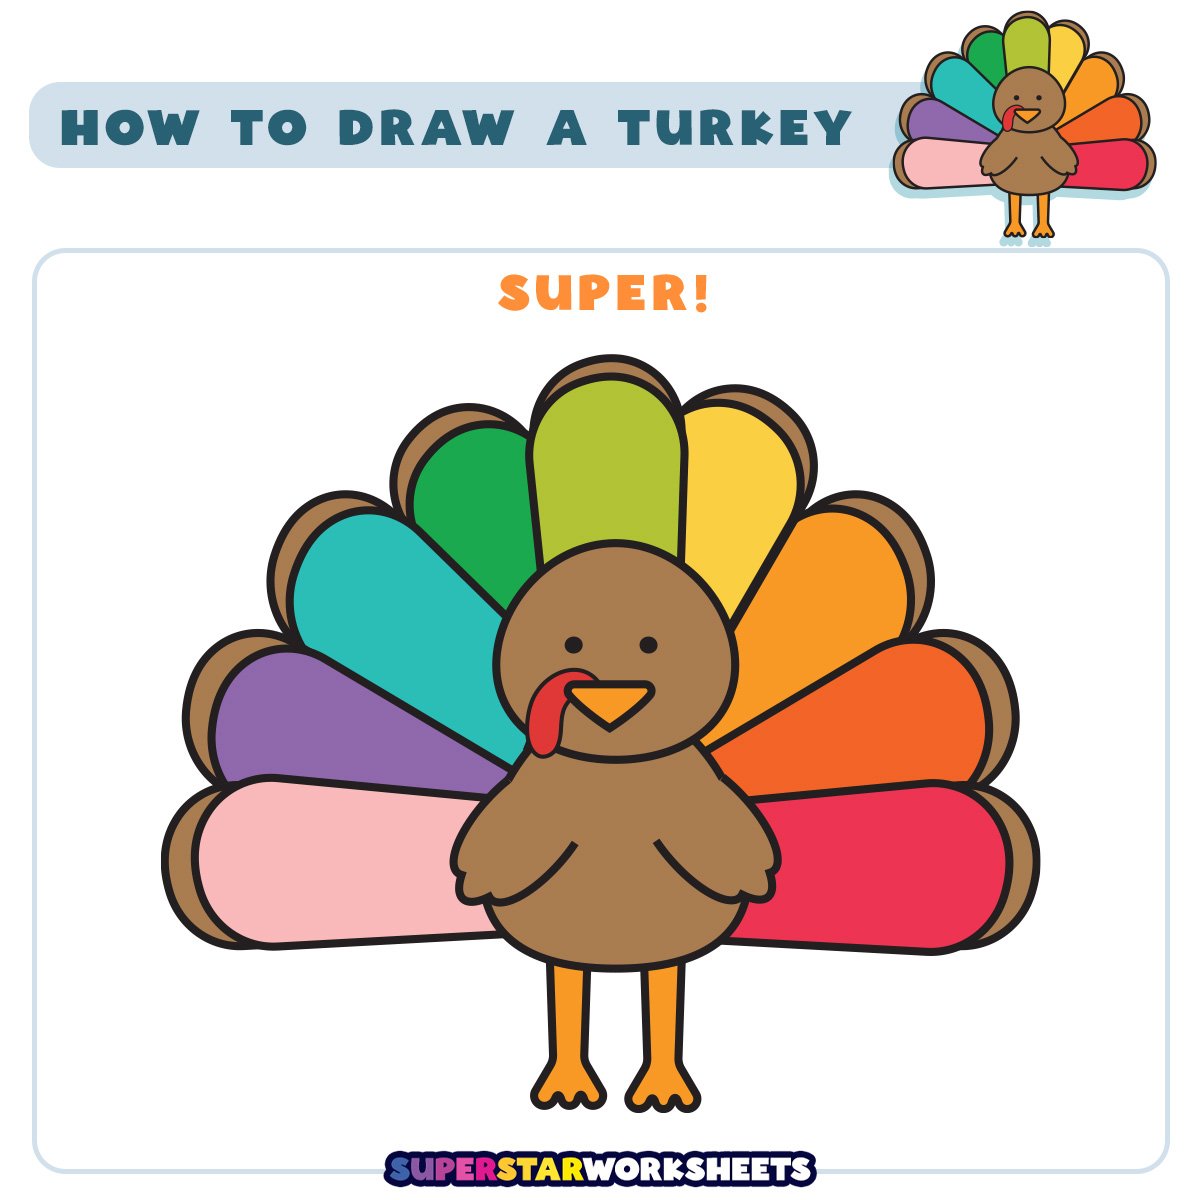
You Drew a Turkey!
Your simple and cute turkey is complete! Practice drawing turkeys of all shapes and sizes, you could even make a family of turkeys, mom, dad, and baby turkey! For more FREE turkey coloring printables, try our Turkey Templates today!
We’ve also included some fun turkey facts for kids along the way! If your students enjoy learning how to draw a turkey have them try our free How to Draw a Turtle printables.

Comment (1)
These are great even for adults that can’t draw a stick! Love them! Think they were be great for the seniors in my church!